What if you could start every crochet project in the round with a perfectly closed center—no hole, no loose loop, just clean, professional results from stitch one?
If you’ve ever made an amigurumi, a cozy coaster, or a granny square, you’ve probably run into the dreaded “hole in the middle.” That little gap isn’t just a cosmetic flaw—it can let stuffing escape, weaken your fabric, or just make your project feel unfinished.
But there’s a better way. Enter: the magic ring (also called the magic circle or adjustable loop). This simple yet powerful technique lets you pull your starting loop completely shut after your first round, giving you total control over tension and a flawless finish every time.
In this step-by-step guide, you’ll learn exactly how to make a magic ring—even if you’ve only just learned to chain. We’ll break it down into manageable steps, address the most common frustrations beginners face, and show you how to use this skill in real, satisfying projects. No jargon, no overwhelm—just clear, friendly guidance.
Ready to close that gap for good? Let’s get started.
Why the Magic Ring Is a Game-Changer
Before the magic ring became popular in the early 2000s, crocheters typically started round projects by chaining 4–6 stitches, joining with a slip stitch, and working into the center of that ring.
Sounds fine—until you finish. That initial loop never fully closes, no matter how tightly you pull the tail. The result? A persistent hole that looks unpolished and can compromise the structure of stuffed toys or dense fabrics.
The magic ring solves this by creating a temporary, adjustable loop that you work your first round into—then pull shut like a drawstring bag. The result: a seamless, tight center that looks professionally finished.
Why this matters for you:
- Your amigurumi will hold stuffing without leaks
- Your coasters and dishcloths will lie flat and look neat
- Your confidence will grow—you’ll feel like a “real” crocheter
- You’ll impress friends and customers with clean, consistent work
Best of all? It works with any stitch—single crochet, double, even clusters—and takes only a few extra seconds once you get the hang of it.
What You’ll Need (It’s Simpler Than You Think)
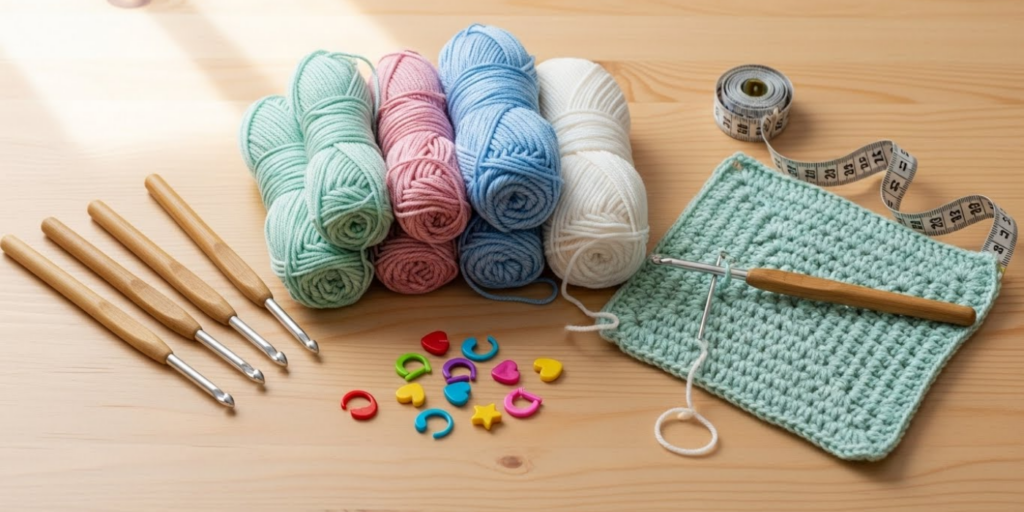
You don’t need special tools—just the basics:
✅ Yarn: Medium weight (worsted/Category 4) in a light, solid color. Avoid dark, fuzzy, or slippery yarns while learning—they hide your stitches.
✅ Crochet hook: Match the size on your yarn label (usually 5.0–5.5mm for worsted).
✅ Scissors
✅ Tapestry needle (for weaving in ends later)
Pro tip: Choose cotton or acrylic yarn—it has enough grip to hold your loop in place while you learn.
Set aside 10–15 minutes in good lighting. And remember: it’s normal to try 2–3 times before it clicks. Every expert crocheter was once stuck on this exact technique!
Step-by-Step: Making Your First Magic Ring
Let’s walk through it slowly. Go at your own pace—you’ve got this.
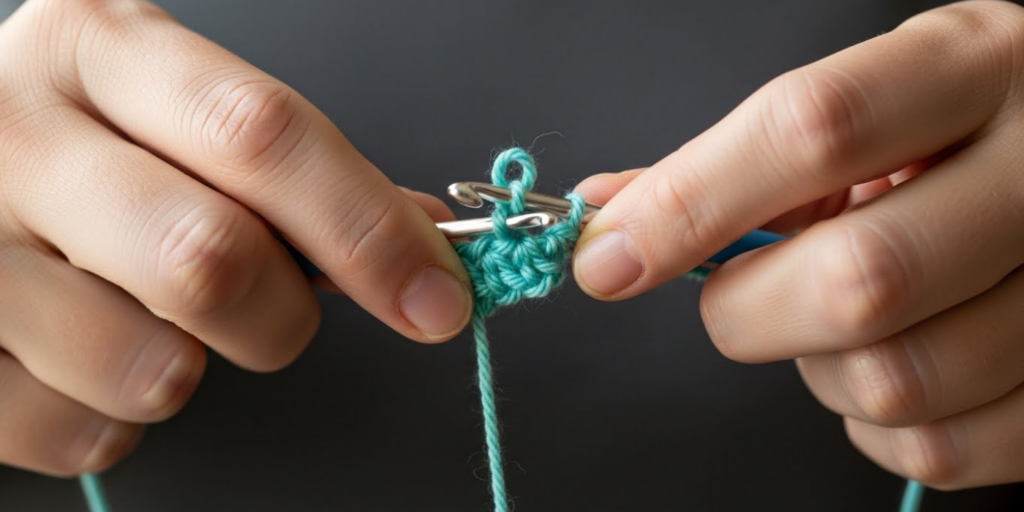
Step 1: Create the Loop
Hold the tail end of your yarn (leave a 6-inch tail) in your non-dominant hand. Drape the working yarn (connected to the skein) over your index and middle fingers, crossing it to form a loop that looks like a lowercase “q” or a lasso.
Don’t pull it tight! Keep the loop loose and open—about the size of a quarter.
Step 2: Insert Your Hook
With your hook in your dominant hand, insert it under the top strand of the loop (the one closest to you). Now, catch the working yarn behind the loop and pull it back through to create a chain stitch.
You should now have one loop on your hook—this is your foundation for the first stitch.
Step 3: Work Your First Stitch
Let’s start with a single crochet (sc), the most common stitch for magic rings:
- Yarn over
- Insert hook into the center of the loop (not into a chain!)
- Yarn over and pull up a loop (2 loops on hook)
- Yarn over and pull through both loops
You’ve just made your first single crochet inside the magic ring!
Key reminder: Keep your loop loose as you work. Tightening too early makes it impossible to close later.
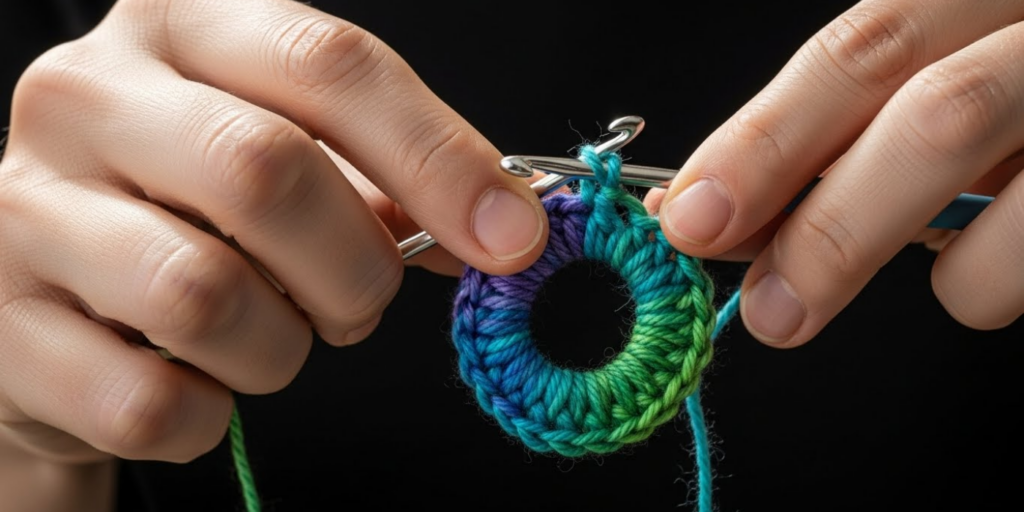
Step 4: Complete the Round
Continue working your required number of stitches into the ring. Common counts:
- 6 sc for amigurumi (standard increase base)
- 8 dc for granny squares or coasters
As you stitch, your work will sit around both layers of the loop (top and bottom strands). This “capture” is what allows the ring to close evenly.
Step 5: Close the Ring
Once your round is complete, hold your work in one hand and gently pull the tail end with the other. The loop will cinch shut like a purse string.
Do this before you join with a slip stitch (if your pattern calls for it). Pulling after joining can distort your stitches.
Step 6: Secure and Move On
Give the tail a firm tug to ensure it’s snug. Then:
- For joined rounds: Slip stitch to the first stitch
- For spiral rounds (common in toys): Just continue to Round 2
Later, weave in the tail with your tapestry needle to lock it in place.
Why Beginners Struggle (and How to Fix It)
It’s completely normal to feel frustrated at first. Here’s how to solve the most common issues:
❌ “The ring won’t stay closed!”
Cause: You didn’t work your stitches around both strands of the loop.
Fix: Always insert your hook under the top strand and over the tail strand. This “captures” both, so the ring can close.
❌ “My yarn keeps slipping off my fingers!”
Cause: The yarn is too smooth or your hands are dry.
Fix: Try cotton yarn, or lightly dampen your fingertips. You can also use a small safety pin to hold the loop in place while you start.
❌ “I can’t see the loop—it disappears!”
Cause: Dark yarn or poor lighting.
Fix: Use white or pastel yarn and sit near a window. Place a dark cloth under your work for contrast.
❌ “My first round is too tight to pull!”
Cause: You tightened the loop while stitching.
Fix: Keep the loop open and relaxed until the round is 100% complete.
Remember: It’s okay to rip it out and try again. Most people nail it by the third attempt!
Practice Projects to Build Confidence
The best way to learn is by doing. Try these beginner-friendly projects:
- Amigurumi Ball: Start with 6 sc in a magic ring, increase evenly. Perfect for stress balls or cat toys.
- Simple Coaster: Work 8 dc in a ring, then add 2–3 decorative rounds. Make a set in different colors!
- Granny Square Center: Many modern granny patterns use a magic ring for a clean start.
- Baby Sock Toe: Begin small rounds with a magic ring for seamless shaping.
Fun fact: Over 95% of contemporary amigurumi designers only use the magic ring—it’s the industry standard for a reason!
Troubleshooting for Left-Handed Crocheters
Lefties, this technique works for you too! Just mirror the instructions:
- Hold the tail in your right hand
- Drape working yarn over right index and middle fingers
- Insert hook from the right side of the loop
Many left-handed crocheters find it helpful to watch mirrored video tutorials (search “left-handed magic ring” on YouTube).
Why This Skill Will Transform Your Crochet Journey
Mastering the magic ring does more than close a hole—it builds foundational skills that ripple through your entire craft:
- Better tension control: You’ll learn to manage yarn flow from the very first stitch.
- Pattern confidence: You’ll feel comfortable tackling advanced amigurumi or lace.
- Professional results: Your handmade gifts will look polished and intentional.
- Creative freedom: You’ll stop avoiding round projects out of fear.
Think of the magic ring as your secret handshake into the world of confident crocheting.
Final Tips for Long-Term Success
To make this skill stick:
🔁 Practice daily – Even 5 minutes builds muscle memory
🧵 Use the same yarn/hook while learning to build consistency
📓 Keep a swatch journal – Note what works (and what doesn’t)
❤️ Celebrate small wins – Finished your first closed ring? That’s huge!
And most importantly: be kind to yourself. Crochet is a journey, not a race.
Conclusion: Close the Gap, Open New Possibilities
The magic ring might seem tricky at first, but with a little patience and the right guidance, it quickly becomes one of the most rewarding techniques in your crochet toolkit. No more gaps, no more frustration—just clean, confident starts every single time.
Whether you’re making gifts for loved ones, selling handmade items, or just enjoying a mindful hobby, this small skill will elevate your work from “homemade” to “handcrafted with care.”
So grab your hook, choose a cheerful skein of yarn, and give the magic ring a try. You might just wonder how you ever crocheted without it.
Did you get it on your first try—or did it take a few attempts? Share your experience in the comments below! And if this tutorial helped you, pass it on to a fellow crafter who’s ready to close that gap for good. Happy hooking! 🧶

Maria Santos is a dedicated crochet and knitting enthusiast who finds joy in turning simple strands of yarn into meaningful, handmade art. With a natural eye for detail and a deep love for fiber crafts, she brings warmth, creativity, and years of personal experience to every project. Maria is inspired by the stories woven into each stitch and loves sharing that passion with others.


