You don’t need to be a craft expert to create something beautiful. Sometimes, all it takes is a hook, some yarn, and the courage to make your first stitch.
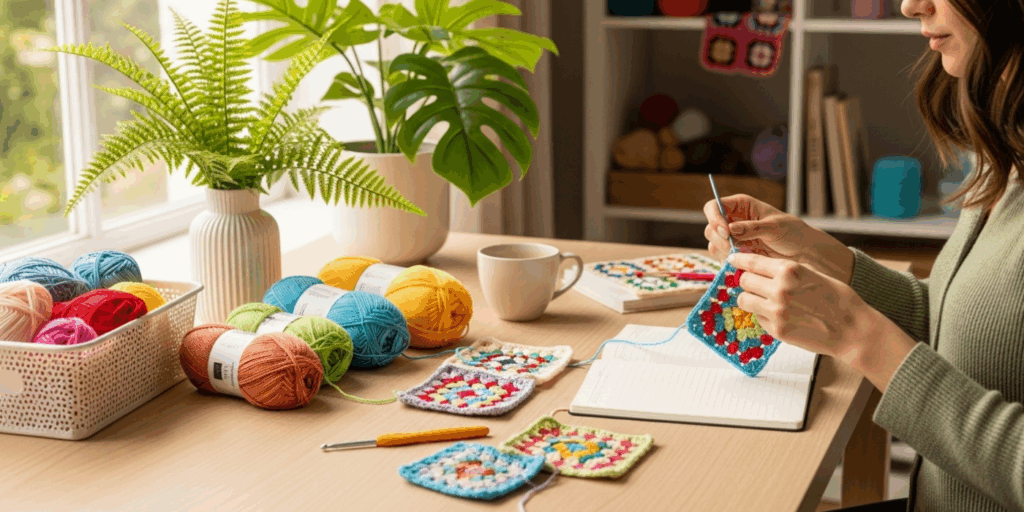
If you’ve ever seen a colorful blanket made of tiny, square motifs—each one a little mosaic of color and texture—you’ve seen a granny square. These iconic crochet pieces have been passed down through generations, from grandmothers’ laps to modern Instagram feeds. And here’s the best part: you can make one too—even if you’ve never held a crochet hook before.
In this guide, we’re going to break down the granny square into its simplest, most approachable form. No confusing terminology. No overwhelming patterns. Just clear, step-by-step instructions designed for absolute beginners. Whether you’re looking for a calming hobby, a meaningful gift, or a way to reconnect with a timeless craft, the granny square is your perfect starting point.
By the end of this tutorial, you’ll have created your very first granny square—and you’ll understand exactly how to keep going. We’ll cover why this pattern is so beloved, what supplies you actually need (spoiler: it’s less than you think), how to avoid common beginner mistakes, and even how to turn one square into something extraordinary. Plus, you’ll discover how this tiny project can bring big joy—into your hands, your home, and even your heart.
Let’s begin.
Why the Granny Square? More Than Just a Pattern
You might wonder: Why start with a granny square? There are so many crochet patterns out there. Why not jump straight into a scarf or a hat?
Here’s the truth: the granny square is the perfect gateway into crochet.
It’s repetitive, forgiving, and satisfying. Unlike long rows that can twist or unravel, the granny square grows outward in rounds, making it easy to see your progress. Each round is like a mini victory. You finish one, and you can immediately see the shape taking form. That visual feedback? It’s incredibly motivating—especially for beginners who sometimes feel discouraged when their first attempts look… well, messy.
And here’s something else: granny squares are timeless. They’ve been around since the 1800s, made by women using scraps of leftover yarn. In times of scarcity, they turned little bits of color into warm blankets. Today, they’re still beloved—not just for their utility, but for their story. Every granny square carries a little piece of history.
Plus, they’re endlessly customizable. Want to use up leftover yarn from that sweater you unraveled? Perfect. Love bold neon colors? Go for it. Prefer soft pastels for a baby blanket? That works too. There are no rules. Only possibilities.
And here’s the magic: once you master one granny square, you can make a hundred. Sew them together, and suddenly, you’ve created a blanket, a pillow, a tote bag, even a scarf. One small square becomes a whole world of projects.
Think of it like learning to paint. You don’t start with a mural. You start with a single brushstroke. The granny square is your brushstroke.
What You Actually Need (No Fancy Gear Required)

Before you dive in, let’s talk supplies. You might imagine you need a whole toolkit: 12 different hook sizes, a yarn winder, a tape measure, stitch markers… the list goes on.
The truth? You need almost nothing.
For your first granny square, all you need is:
- One crochet hook (size H/5.0mm is ideal for beginners—it’s easy to hold and works well with medium-weight yarn)
- One skein of worsted weight yarn (Category 4—look for labels that say “medium” or “4”)
- Scissors
- A yarn needle (optional, but helpful for weaving in ends later)
That’s it. No fancy gadgets. No expensive kits. You probably already have most of this lying around.
Pro tip: Choose a light-colored yarn. White, cream, or light gray makes it easier to see your stitches. Dark colors? They’re beautiful—but harder to count stitches when you’re just starting.
As for the hook, if you’re unsure, pick a size H. It’s the Goldilocks of crochet hooks—not too big, not too small. It’s the one most patterns recommend for beginners, and it gives you a nice, even tension.
And here’s a secret: you don’t need to buy new yarn. If you have an old sweater you don’t wear anymore, unravel it. Or dig through your craft bin—you might find a half-used ball from a project you abandoned years ago. Granny squares were born from scraps. Embrace that spirit.
Your first square doesn’t have to be perfect. It just has to be yours.
Step-by-Step: Making Your First Granny Square (No Experience Needed)
Alright, let’s get our hands dirty. We’re going to make a classic 4-round granny square. By the end, you’ll have a neat little square about 4–5 inches across—perfect for practicing, gifting, or adding to a larger project.
Round 1: The Magic Ring
- Make a slip knot on your hook. Pull it snug but not tight.
- Wrap the yarn over your hook and pull through to create your first chain stitch (ch 1).
- Now, make 4 chain stitches (ch 4). This forms the center loop.
- Insert your hook into the first chain you made (the one closest to the slip knot).
- Pull up a loop, then yarn over and pull through both loops on your hook. You’ve just made a slip stitch—closing the ring. You now have a small circle.
Round 2: The First Cluster
- Chain 3 (this counts as your first double crochet, or dc).
- Make 2 more double crochets into the center ring. (You now have 3 dc together.)
- Chain 2. This is your “corner space.”
- Now, make 3 more double crochets into the ring. That’s your second cluster.
- Chain 2 again.
- Repeat: 3 dc, ch 2, 3 dc—two more times. You’ll end up with four clusters total, each separated by a chain-2 space.
- Slip stitch into the top of the first chain-3 you made at the start. This closes the round.
You’ve just made your first round! Look at that little star shape in the middle. Isn’t that cool?
Round 3: Adding Corners
- Chain 3 (again, counts as your first dc).
- Make 2 more dc into the same space (3 dc total).
- Chain 2.
- Now, make 3 dc into the next chain-2 space from the previous round.
- Chain 2.
- Repeat steps 4–5 three more times (for a total of four corners).
- Slip stitch into the top of the first chain-3 to finish.
You’re building outwards now. Each corner has three stitches, separated by chain-2 gaps. This is the heart of the granny square.
Round 4: The Final Touch
- Chain 3.
- 2 dc in same space.
- Chain 2.
- 3 dc in next chain-2 space.
- Chain 2.
- Repeat all the way around.
- Slip stitch to join.
And… you’re done!
Your square might look a little uneven at first. That’s okay. Your first one always will. The goal isn’t perfection—it’s practice. You’ll get better with every square.
Pro tip: Count your stitches as you go. If you’re missing a corner, it’s usually because you skipped a chain-2 space. Take a breath. Unravel if you need to. Crochet is forgiving. You can always undo and try again.
Common Mistakes (And How to Fix Them Without Frustration)
Even the best crocheters started somewhere—and they all made mistakes.
Here are the three most common beginner errors—and how to fix them easily:
1. My square looks lopsided.
This usually happens when you miss a corner or add an extra stitch. Solution? Count your clusters. You should have four, each with three dc, separated by chain-2 spaces. If you have five, you added one by accident. If you have three, you missed one. Gently pull out the last round and try again. You’ll catch it faster next time.
2. My edges are curling.
Curling often means your tension is too tight. Try relaxing your grip on the yarn. Imagine holding a baby bird—not too loose, not too tight. Practice making your chain stitches a little looser. It helps.
3. I can’t tell where to put my hook.
It’s easy to get lost in the loops. Use a stitch marker (a safety pin or a scrap of contrasting yarn) to mark the first stitch of each round. That way, you always know where you started. You’ll thank yourself later.
Remember: every crocheter has been here. You’re not failing—you’re learning. And each mistake? It’s just a lesson in disguise.
Beyond the Square: How One Pattern Opens a World of Possibilities
Here’s where things get exciting.
Once you’ve made one granny square, you’ve unlocked the key to hundreds of projects.
Imagine turning five squares into a cozy coaster set. Twelve squares? A baby blanket. Forty? A full-sized throw for your couch. Stitch them together in a rainbow pattern, and you’ve got a conversation piece. Sew them in a grid, add a border, and suddenly, you’ve made a tote bag.
You can even mix colors. Try one square with bright pink and yellow. Another with navy and cream. Place them side by side, and you’ve created art without ever painting a single stroke.
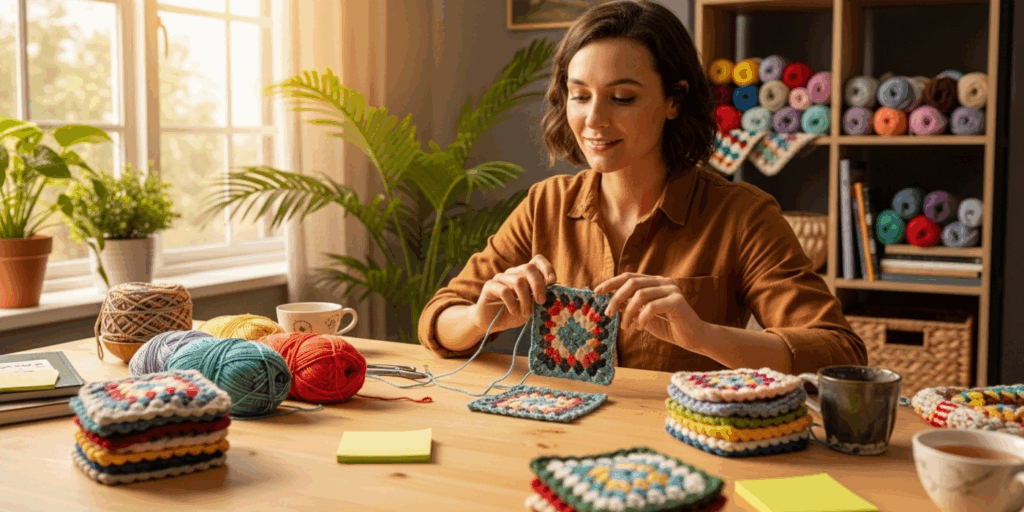
And here’s the emotional payoff: making something with your hands connects you to something deeper. In a world of screens and speed, crochet slows you down. It’s meditation in motion. You breathe. You count. You focus. And for those quiet moments, you’re not thinking about bills, deadlines, or news alerts—you’re just creating.
Many people start with a granny square because they want a gift. But they end up keeping it for themselves. Because in the process, they rediscovered patience. Joy. Calm.
One woman I know started crocheting granny squares after her divorce. She made one every Sunday. By the end of the year, she had a blanket—and a new sense of peace. “It didn’t fix my life,” she told me. “But it gave me back my hands.”
That’s the power of small, repetitive acts done with care.
Tips to Keep You Motivated (And Keep Crocheting)
Starting something new can be thrilling… until life gets busy.
Here are three simple ways to stay on track:
- Set a “5-Minute Rule.”
Tell yourself: “I’ll just do five minutes.” Often, once you start, you’ll keep going. Even five minutes a day adds up to a square in a week. - Keep a “Crochet Journal.”
Grab a notebook. Jot down:
- What color you used
- How many rounds you completed
- How you felt while making it
It’s not about being artistic—it’s about tracking your progress. Seeing “I made 3 squares this month!” is incredibly motivating.
- Join a Community.
Search “granny square crochet” on YouTube or Instagram. You’ll find hundreds of videos, tips, and friendly crocheters sharing their work. Don’t be shy—ask questions. Most are happy to help. You’re not alone in this.
And remember: there’s no timeline. Some people make a square in an hour. Others take a week. That’s okay. This isn’t a race. It’s a gift you’re giving yourself.
Your Next Step: Make One Today
You don’t need to wait for the “right time.” You don’t need to buy special yarn. You don’t need to be “good” at crafts.
All you need is a hook, a strand of yarn, and five minutes.
So right now—before you close this tab—grab your materials. Make that first slip knot. Chain four. Join the ring.
Do it.
Don’t overthink it. Don’t wait for perfect conditions. Just start.
Because the most beautiful things in life aren’t born from grand plans. They’re born from small, consistent actions.
Your first granny square might be imperfect. It might have a crooked corner or a loose stitch. But it will be yours. And that’s what matters.
When you finish, take a picture. Post it. Send it to a friend. Tape it to your fridge. Celebrate it.
Because you didn’t just make a square.
You made a beginning.
Final Thought: The Quiet Magic of Making Something With Your Hands
In a world that values speed, efficiency, and instant results, crochet is a quiet rebellion.
It asks you to slow down. To be present. To trust the process—even when you can’t yet see the whole picture.
The granny square is more than a pattern. It’s a metaphor.
Sometimes, life feels overwhelming. We want to fix everything at once. But what if, instead, we focused on one small thing? One stitch. One square. One day.
You don’t need to make a blanket today.
You just need to make one square.
And when you do?
You’ll realize—you’ve already created something beautiful.
Now it’s your turn.
Have you ever tried crocheting before? Or is this your very first time?
👉 Drop a comment below and tell me:
What color will your first granny square be?
I read every single one—and I’d love to cheer you on.
And if this tutorial helped you, please share it with someone who’s been wanting to try crochet but didn’t know where to start. Sometimes, the kindest thing we can do is pass on a little hope—one stitch at a time.
Happy crocheting.
You’ve got this. 💛

Maria Santos is a dedicated crochet and knitting enthusiast who finds joy in turning simple strands of yarn into meaningful, handmade art. With a natural eye for detail and a deep love for fiber crafts, she brings warmth, creativity, and years of personal experience to every project. Maria is inspired by the stories woven into each stitch and loves sharing that passion with others.


