Imagine holding a skein of yarn that glows with colors you created—not bought, not mass-produced, but dreamed up, mixed, and painted by your own hands. Picture the joy of wrapping a scarf in a hue that matches your favorite sunset, or knitting a sweater in shades that remind you of your grandmother’s garden. This isn’t just crafting. It’s alchemy. And the best part? You don’t need a studio, a degree in chemistry, or a fortune to start.
Dyeing your own yarn at home is one of the most satisfying, creative, and surprisingly simple hobbies to pick up. Whether you’re a knitter, crocheter, spinner, or just someone who loves color, custom-dyed yarn transforms your projects from ordinary to extraordinary. In this guide, we’ll walk you through everything you need to know to begin dyeing your own yarn—from gathering your first supplies to avoiding common mistakes. No experience? No problem. By the end of this article, you’ll have the confidence—and the steps—to create your very first batch of hand-dyed yarn. Let’s turn your yarn into art.
Why Dye Your Own Yarn? (It’s More Than Just Color)
You might be wondering: Why not just buy pre-dyed yarn? After all, craft stores are packed with vibrant options. But here’s the truth: store-bought yarn often looks beautiful on the shelf—but it rarely feels yours.
When you dye your own yarn, you’re not just adding color. You’re adding intention. You choose every shade, every gradient, every speckle. Maybe you want a deep indigo that fades like twilight into soft lavender—something no manufacturer offers. Or perhaps you’re recreating the exact green of your childhood treehouse. Hand-dyed yarn carries memory, emotion, and personal expression.
Plus, there’s a practical side. Many commercial yarns use synthetic dyes that can be harsh on skin or the environment. By choosing natural or fiber-reactive dyes (which we’ll cover soon), you can make something gentler—and more sustainable.
And let’s not forget the cost. A single skein of high-quality hand-dyed yarn can cost $30 or more. With a $20 dye kit and a few basic tools, you can dye a dozen skeins for less than $5 each. That’s not just savings—it’s freedom.
Think of it like baking your own bread instead of buying it. You control the ingredients, the texture, the flavor. Hand-dyed yarn is the same. It’s intimate. It’s personal. And once you try it, you’ll never look at store-bought yarn the same way again.
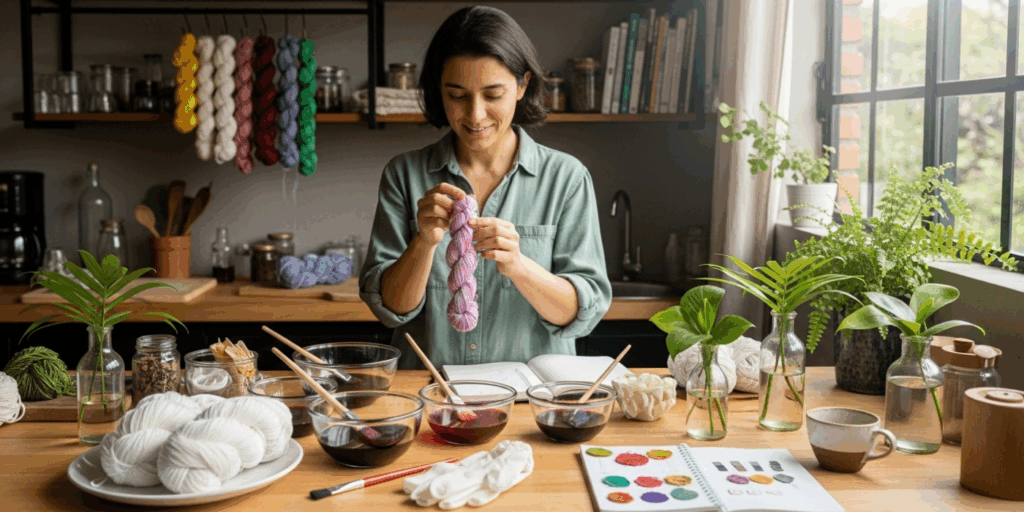
Your First Dyeing Kit: What You Actually Need (No Fluff!)

You don’t need a lab. You don’t need a fancy studio. In fact, your kitchen sink might be the perfect place to start.
Here’s your starter kit—everything you need for your first dye session, all under $50:
- Unprocessed yarn (also called “undyed” or “greige” yarn). Look for 100% animal fibers like wool, alpaca, or silk. These absorb dye beautifully. Avoid acrylic or blends—they won’t take color well.
- Fiber-reactive dye (like Procion MX). These dyes bond permanently with protein fibers and are safe for home use. They come in powder form and are sold in small, colorful packets. Start with 3–5 basic colors: red, yellow, blue, black, and white.
- Sodium carbonate (also called soda ash). This is the “fixer” that helps the dye stick. You can buy it in bulk online or even find it in some laundry aisles labeled as “pH increaser.”
- Rubber gloves. Seriously. Don’t skip this. Dye stains everything.
- Plastic containers or buckets (2–3). You’ll need one for soaking, one for dye mixing, and one for rinsing.
- Measuring spoons and a kitchen scale (optional but helpful). Precision helps consistency.
- Plastic wrap or zip-top bags. For wrapping dyed yarn to let the color set.
- Old towels or a plastic tablecloth. Because spills happen.
- A long spoon or chopstick. For stirring without touching the dye.
- White vinegar. For rinsing out excess dye after the process.
That’s it. No special equipment. No expensive machines. Just your hands, a little patience, and a willingness to get a little messy.
Pro tip: Start with a small amount—100 grams of yarn (about 1 skein). That way, if your first batch turns out wild (and it might!), you haven’t invested much.
The Magic of Color: How to Mix and Apply Dyes Like a Pro
Now for the fun part: making color.
The secret to stunning hand-dyed yarn? It’s not about mixing colors perfectly—it’s about letting them dance together.
Let’s say you want a gradient from deep purple to soft pink. Here’s how:
- Soak your yarn in warm water mixed with soda ash (1 tablespoon per quart) for 20 minutes. This opens up the fiber so it can drink in the dye.
- Squeeze out excess water—your yarn should be damp, not dripping.
- Prepare your dyes. Mix each color powder with warm water in small cups (about 2 tablespoons water per 1/4 tsp dye). Use a different cup for each color.
- Apply the dye. Lay your yarn flat on a plastic surface. Use a squeeze bottle, paintbrush, or even a dropper to drip or paint the dye onto sections. Start with purple at one end, then blend in pink halfway through. Let the colors touch—but don’t overmix.
- Wrap it up. Roll the yarn loosely in plastic wrap like a burrito. This traps heat and moisture, helping the dye set.
- Let it sit. 12–24 hours. Yes, that’s it. No stirring. No fuss. Just patience.
Here’s the magic trick: The colors will bleed into each other slightly as they set. That’s not a mistake—that’s what gives hand-dyed yarn its soul. Think of it like watercolor painting. You don’t want sharp lines. You want soft edges, surprises, depth.
Try this: Dab a few drops of red, then blue, then yellow randomly across your yarn. When it sets? You’ll get unexpected purples, greens, and oranges. It’s like a color lottery—and you win every time.
Bonus idea: For a “speckled” look, use a toothbrush to flick tiny dots of dye onto the yarn. It creates a starry-night effect perfect for socks or shawls.
Common Mistakes (And How to Avoid Them)
Even the most experienced dyers make mistakes. But knowing these pitfalls ahead of time will save you time, frustration, and maybe even a favorite sweater.
Mistake #1: Using the wrong yarn.
Acrylic, nylon, or cotton blends won’t take dye the same way wool will. Stick to 100% wool, alpaca, or silk for best results. If you’re unsure, check the label—or test a tiny swatch first.
Mistake #2: Skipping the soda ash soak.
This step is non-negotiable. Without it, your colors will wash out. Think of soda ash as the glue that holds the dye to the fiber. Skip it, and your beautiful yarn becomes a faded memory.
Mistake #3: Using your good mixing bowls.
Dye stains permanently. Use old Tupperware, plastic bins, or even disposable containers. Label them “DYE ONLY” and keep them in a drawer. You’ll thank yourself later.
Mistake #4: Not rinsing properly.
After the dye sets, rinse your yarn in cool water until the water runs clear. Then wash it with a gentle wool wash (like Eucalan) and air-dry flat. Skipping this step leaves leftover dye that can bleed onto your finished project.
Mistake #5: Expecting perfection.
Hand-dyed yarn is supposed to be imperfect. Splotches? Uneven streaks? That’s not a flaw—that’s character. The most beautiful skeins are the ones that look like they were painted by moonlight, not by a machine.
Remember: Every “mistake” is a lesson. I once dyed a skein that turned out mostly gray because I mixed too many colors. I thought it was ruined. Turns out, it became my favorite—soft, moody, and perfect for winter hats.
Beyond the Basics: Experimenting with Techniques (And Having Fun)
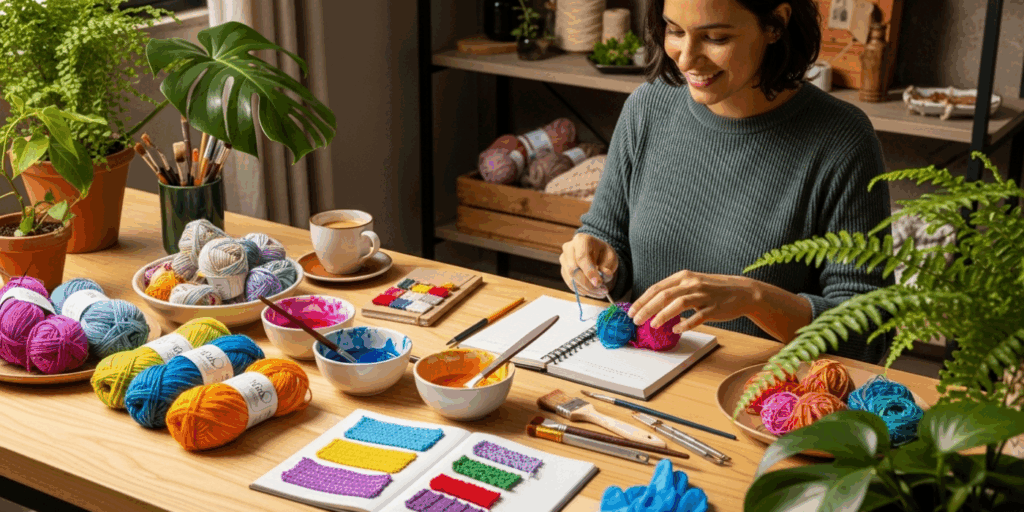
Once you’ve mastered the basics, the real joy begins: experimentation.
Here are three easy techniques to try next:
1. The “Splash” Method
Tie your yarn loosely into a loose knot or ball. Dip different sections into different dye baths. Unwrap it to reveal bold, abstract patterns. Great for scarves.
2. The “Gradient Dip”
Hang your yarn vertically in a tall container. Dip the bottom inch into a dark dye, then slowly lift it up an inch every 10 minutes. The result? A beautiful fade from dark to light—like an ombre sunset.
3. The “Kettle Dye”
Boil your yarn in a pot with dye and vinegar (this works best with natural dyes like onion skins, beetroot, or avocado pits). It’s slower, more traditional, and gives earthy, muted tones. Perfect for rustic sweaters.
And here’s a secret: You can dye yarn with kitchen ingredients. Avocado pits and skins make soft pink. Onion skins? Golden yellow. Red cabbage? Blue-purple (if you add vinegar). It’s eco-friendly, affordable, and deeply satisfying.
I once dyed a whole skein using the skins from 10 avocados I’d eaten for lunch. It turned out a dusty rose—my daughter called it “the color of my heart.” That’s the magic. It’s not just yarn. It’s story.
The Joy of Creating Something Truly Yours
There’s something deeply human about making things with your hands.
In a world where everything is mass-produced, fast, and disposable, hand-dyeing yarn is a quiet rebellion. It’s slow. It’s thoughtful. It demands presence.
Every time you sit down to dye, you’re not just creating yarn—you’re creating calm. You’re tuning out the noise. You’re choosing color over chaos. You’re turning a simple ball of fiber into a piece of your personal universe.
And when you wear that scarf? Or gift that hat? Or wrap that blanket around your shoulders on a chilly evening? You’re not just wearing fabric. You’re wearing a memory. A moment. A decision you made to create something beautiful, just for you.
I’ve had students tell me they started dyeing yarn after a breakup. Or during chemotherapy. Or after losing a parent. Each time, they said the same thing: “It gave me back my sense of control.”
Color doesn’t fix everything. But it can help you feel like yourself again.
Ready to Start? Here’s Your First Step
You don’t need to be an artist. You don’t need to know how to knit. You don’t even need a big space.
All you need is one skein of undyed wool, a plastic container, some dye powder, and 30 minutes of quiet time.
So here’s my challenge to you:
This week, buy a small dye kit.
Soak one skein.
Drip one color.
Wrap it up.
Wait 24 hours.
Rinse. Dry. Wear it.
Then come back here—and tell me what color you made.
Was it bold? Unexpected? Quiet? Wild?
I want to hear about it. Because the moment you dye your first skein, you don’t just become a crafter.
You become a creator.
And that? That changes everything.
P.S. If you try this, snap a photo of your first hand-dyed yarn and tag me on Instagram (@YourCraftingJourney) — I’ll feature my favorites next month. Let’s build a community of color-lovers, one skein at a time.
What’s the first color you’d dye if you could choose anything? Drop your answer below—I’ll reply to every comment.

Maria Santos is a dedicated crochet and knitting enthusiast who finds joy in turning simple strands of yarn into meaningful, handmade art. With a natural eye for detail and a deep love for fiber crafts, she brings warmth, creativity, and years of personal experience to every project. Maria is inspired by the stories woven into each stitch and loves sharing that passion with others.


