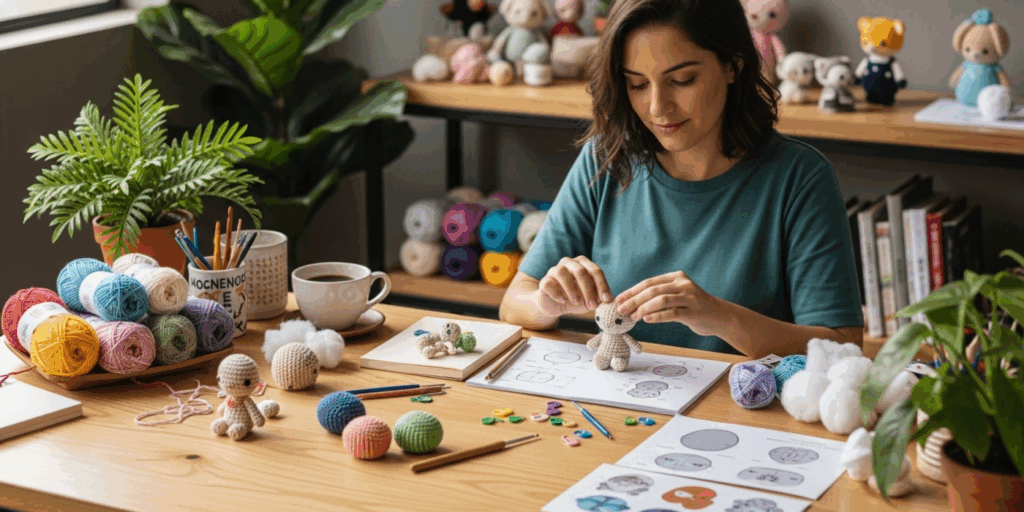
You’ve just finished your first amigurumi project—a cute little bunny, a wobbly octopus, or maybe a sleepy dragon. You sewed the last stitch, tied off the yarn, and… stared at it. It’s okay. But it’s not right. The ears flop sideways. The belly looks lumpy. The head doesn’t quite sit right on the neck.
You’re not alone.
Every amigurumi crafter—whether you’ve been stitching for weeks or years—has hit this moment. The gap between “I made this” and “This looks magical.” The secret? It’s not in the pattern. It’s not even in your hook size. It’s in the stuffing and the sculpting.
This guide is your hands-on roadmap to transforming your amigurumi from “cute-ish” to utterly enchanting. We’ll break down the often-overlooked art of stuffing—how much, where, and when—and teach you simple sculpting tricks that give your creations life, dimension, and personality. No fancy tools. No expensive supplies. Just you, your yarn, and a few clever techniques that make all the difference.
By the end, you’ll know how to create smooth curves, firm limbs, expressive faces, and bodies that feel real—like they could hop off your shelf and say hello. Let’s turn your plushies into works of art.
Why Stuffing Isn’t Just “Fill It Up and Call It Done”
Let’s be honest: stuffing feels like the boring part. You’ve done all the fun stitching—increasing, decreasing, changing colors—and now you’re left with a hollow shell and a big bag of polyester fiberfill. It’s tempting to just shove it in, pack it tight, and call it a day.
But here’s the truth: poor stuffing is the #1 reason your amigurumi looks flat, lumpy, or just… off.
Think of it like baking a cake. You can follow the recipe perfectly—measure the flour, preheat the oven, mix the eggs—but if you underbake it, the center stays soggy. Overbake it, and it turns to cardboard. Same with stuffing. Too little, and your creature looks deflated, like a balloon losing air. Too much, and it bulges unnaturally—ears puff out like balloons, limbs become stiff rods, and the face gets stretched into a weird smile.
The goal? Even, controlled pressure. Not “packed like a suitcase,” but “firm like a ripe peach.”
Here’s how to get it right:
- Use small handfuls, not big wads. Push fiberfill in slowly, one pinch at a time.
- Stuff in layers. Start with the bottom, then work upward. This prevents air pockets and uneven bulges.
- Check symmetry. After stuffing each limb or ear, compare both sides. If one is puffier, take a little out.
- Don’t forget the “core.” For heads and bodies, place a slightly tighter core in the center—it gives structure. Then gently loosen the outer layers to create soft curves.
Pro tip: Use a chopstick, crochet hook, or even a clean pen to nudge fiberfill into tight spots like toes, fingers, or the tip of a nose. You’d be surprised how much difference a little precision makes.
And here’s the magic trick: Stuff your pieces before sewing them together. It’s tempting to wait until everything’s assembled, but that makes sculpting nearly impossible. Stuff each part individually—then sew. It gives you control over shape, tension, and proportion.
Your amigurumi isn’t just a toy. It’s a sculpture. And like any sculpture, it needs the right foundation.
Sculpting with Purpose: Turning Yarn into Personality
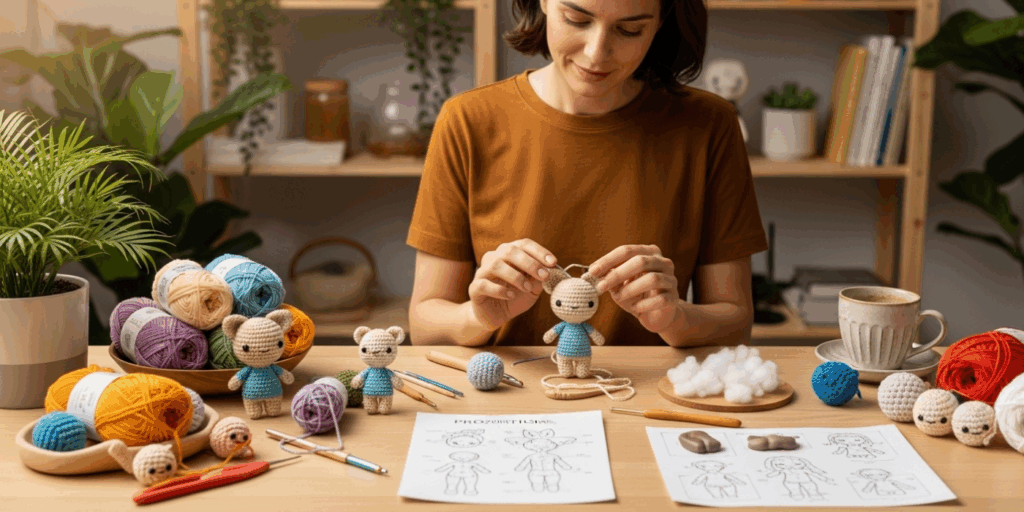
Now that your pieces are stuffed, let’s talk about the real art: shaping.
Stuffing gives volume. Sculpting gives soul.
Think of your amigurumi’s body like clay. You don’t just press it into a ball—you pinch, roll, mold, and smooth it to create curves, angles, and expressions. The same applies to yarn.
Take ears, for example. A floppy bunny ear isn’t just “long and stuffed.” It’s tapered. You want it thick at the base, gently narrowing toward the tip. How? After stuffing, gently roll the ear between your fingers, starting at the base and working outward. This compresses the fiberfill just enough to create a natural slope.
For limbs? Avoid the “sausage look.” Instead, create subtle joints. After stuffing a leg, leave a small space—about half an inch—near the top before stuffing the final section. This lets you pinch and shape the “knee” or “elbow” with your fingers. Squeeze gently, then secure with a few hidden stitches. Instant realism.
And faces? Oh, the face is everything.
A flat, evenly stuffed head looks like a balloon with eyes glued on. But a sculpted head? It has character.
Here’s how:
- Eyes: Don’t place them too close together. Leave a little space—about the width of one eye—between them. This gives your creature a more natural, alert expression.
- Nose: Stuff a tiny bit more in the center of the muzzle. Then, gently pull the stitches tighter around the nose area as you close it. This creates a slight upward curve, making your amigurumi look sweet, not surprised.
- Cheeks: Add just a whisper of extra fiberfill on the sides of the cheeks. Then smooth it with your fingertips. It’s the difference between a flat face and one that looks like it’s blushing.
I once made a hedgehog that looked… sad. Flat eyes. Slumped shoulders. I thought it was the pattern. Turns out, I’d stuffed the body too tightly and didn’t shape the head at all. I took it apart, re-stuffed with intention, and gently rounded the cheeks. Within minutes, he looked like he was smiling at the sun.
Your amigurumi doesn’t just need to look cute—it needs to feel alive.
That’s sculpting.
The Magic of “Tightening” and “Shaping Stitches”
Here’s something most patterns don’t tell you: your final stitches aren’t just for closing—they’re for sculpting.
When you finish a round and pull the yarn tight to close a head, a bottom, or a foot, you’re not just sealing a seam. You’re defining a shape.
Let’s say you’re closing the bottom of a bear’s foot. If you pull the yarn evenly, you get a flat circle. But if you pull more tightly on the sides and leave the center slightly looser, you create a gentle curve—like a real paw sinking into grass.
This is called strategic tension.
Here’s how to use it:
- For rounded shapes (heads, bellies): Pull the final closing stitches evenly, but don’t yank them to the extreme. Let them sit just snug.
- For pointed shapes (ears, snouts): Pull the center stitch extra tight, then secure with a few hidden knots. This creates a natural point.
- For flat areas (backs, feet): Pull the stitches firmly, but space them evenly. You want smooth, not wrinkled.
Another pro trick: Use a tapestry needle to “tuck” fiberfill inward as you close. After you’ve pulled the yarn through, gently push the stuffing back toward the center with the needle tip. This prevents lumps from forming right at the seam.
And here’s a game-changer: invisible shaping stitches.
Before you close a piece, work one or two rounds with slightly tighter stitches than the previous ones. For example, if you’ve been working in single crochets, switch to tight single crochets—or even slip stitches—for the last round. This subtly tucks the fabric inward, creating a smoother transition from one part to another.
Try it on a bunny’s neck. After stuffing the head, do one round of tight single crochets before attaching the body. It creates a natural “neck” instead of a sudden, awkward bump.
These aren’t magic tricks. They’re tiny, intentional choices. And when you layer them together? They turn your creation from “handmade” to handcrafted.
Real-World Fixes: Solving Common Amigurumi Problems
Even with the best intentions, things go wrong. And that’s okay.
Here are five common amigurumi mishaps—and how to fix them, fast:
1. Lumpy belly?
→ You stuffed too much in the center. Unstitch the bottom, pull out half the fiberfill, then redistribute it evenly from the sides inward. Smooth with your fingers.
2. Ears that won’t stand up?
→ They’re too soft. Insert a thin pipe cleaner or wire (cut to size) into the base before stuffing. Bend it gently into shape. Cover with a layer of yarn to hide it. Instant structure.
3. Head tilts to one side?
→ Uneven stuffing. Take the head off, re-stuff with equal amounts on both sides. Then, when sewing it on, pull the thread slightly tighter on the side that needs to lift.
4. Legs look like sausages?
→ You didn’t create joints. Stuff the top third, then the bottom third, leaving the middle loose. Pinch the middle between your fingers, then stitch it in place. It’ll look like a knee or ankle.
5. Face looks “stuck on”?
→ You didn’t sculpt the muzzle. Add a tiny bit more stuffing under the nose area. Then, as you close the face, pull the stitches tighter across the cheeks and chin. This creates a natural “muzzle” shape.
One of my students once made a cat whose head looked like it was falling off. She thought the pattern was broken. We just re-stuffed the neck area with a bit more fiberfill, added one tightening stitch row, and voilà—her cat now looked like it was proudly holding its head high.
Fixing mistakes isn’t failure—it’s part of the process.
Keep a small pair of tweezers and a spare crochet hook handy. They’re your best friends when you need to reach deep inside a stuffed limb or nudge fiberfill into a tight spot.
And remember: your amigurumi doesn’t need to be perfect. It just needs to be you.
The Art of Patience: Why Slow Stuffing Creates Soul
Here’s something I wish someone had told me when I started:
The best amigurumi aren’t made fast. They’re made with care.
I used to race through stuffing. I’d watch Netflix, stuff a dozen bunnies in an evening, and feel proud. But they all looked… the same. Generic. Lifeless.
Then I slowed down.
I started stuffing one piece at a time. I’d hold it in my hands, turn it slowly, feel where it needed more, where it needed less. I’d pause. Breathe. Adjust.
And suddenly, my creations changed.
The bunny’s ears curled just so. The owl’s head tilted with quiet curiosity. The octopus’s tentacles curled like they were reaching for something.
It wasn’t the yarn. It wasn’t the hook.
It was the presence.
When you rush, you’re just assembling. When you slow down, you’re sculpting.
Try this: Set aside 15 minutes—just 15—to stuff one small piece. No phone. No distractions. Just you, the fiberfill, and your hands. Feel the texture. Listen to the rustle. Notice how the yarn responds to your touch.
You’ll be amazed at how much more alive your work becomes.
This isn’t just about technique. It’s about connection.
Your amigurumi isn’t just a toy. It’s a little companion. A quiet friend. Maybe it’s for a child. Maybe it’s for you. Either way, it carries your energy.
So take your time.
Let the stuffing be a meditation.
Let the shaping be a conversation between your hands and your heart.
The world doesn’t need more mass-produced plushies.
It needs more soul.
Your Turn: Make It Yours
You’ve learned the secrets:
- Stuff in small layers, not big wads.
- Sculpt with your fingers, not just your hook.
- Use tightening stitches to define shape.
- Fix mistakes with patience, not frustration.
- And above all—slow down.
Now it’s your turn.
Grab your next project. Don’t rush. Don’t skip the stuffing. Don’t ignore the little details.
As you work, ask yourself: What kind of personality does this creature have?
Is it shy? Playful? Wise? Sleepy?
Let that feeling guide your hands.
Maybe your next bunny has ears that tilt like it’s listening for rain.
Maybe your dragon’s wings curve like they’re about to take flight.
Maybe your octopus has one tentacle curled around a tiny pearl—because why not?
There are no rules here. Only possibilities.
And every stitch you make with intention? That’s where magic lives.
I’d love to see what you create. Share your finished pieces on Instagram with #MyAmigurumiSoul—or drop a comment below and tell me: What’s the first amigurumi you’re going to sculpt differently?
Your hands are already capable.
Now go make something that doesn’t just sit on a shelf…
…but smiles back at you. 💛

Maria Santos is a dedicated crochet and knitting enthusiast who finds joy in turning simple strands of yarn into meaningful, handmade art. With a natural eye for detail and a deep love for fiber crafts, she brings warmth, creativity, and years of personal experience to every project. Maria is inspired by the stories woven into each stitch and loves sharing that passion with others.


