Introduction
You’ve just finished your most ambitious crochet (or knitting) project yet—a delicate lace shawl with intricate motifs, a tailored sweater with precise seams, or a set of matching granny squares for a heirloom blanket. But when you lay it flat, something’s off: the edges ripple, the corners curl, or the stitches look uneven. Before you sigh in frustration, take a breath—your project isn’t flawed. It simply hasn’t been blocked.
Blocking is the secret finishing step that transforms handmade fabric from “homemade” to “heirloom quality.” But while basic blocking is widely known, advanced blocking techniques unlock next-level control—allowing you to sculpt drape, stabilize lace, align seams with millimeter precision, and even reshape garments after wear.
In this guide, you’ll move beyond the basics to master precision wet blocking, steam sculpting, fiber-specific methods, and professional finishing tricks used by designers and sample makers. Whether you’re working with merino wool, cotton, acrylic, or silk blends, you’ll learn how to shape your projects so they look polished, professional, and perfectly tailored to your vision. Let’s turn your finished object into a true work of art.
Why Advanced Blocking Is a Game-Changer
Most crafters think of blocking as “flattening” a piece. But advanced blocking is about intentional shaping—giving your project its final form, function, and feel.
Consider this: unblocked lace is like a closed flower; blocked lace blooms into its full design. A sweater knitted with slight tension inconsistencies? Blocking evens it out so seams align perfectly. Granny squares that won’t lie flat? Blocking makes them uniform so your blanket lies smooth.
Moreover, blocking affects longevity. Properly blocked garments maintain their shape through washes, while unblocked ones stretch or distort over time.
As designer and teacher Shannon Cook puts it:
“Blocking isn’t optional—it’s the final stitch.”
For makers selling their work, gifting pieces, or entering fiber arts shows, advanced blocking is non-negotiable. It’s what separates a hobby project from a professional one.
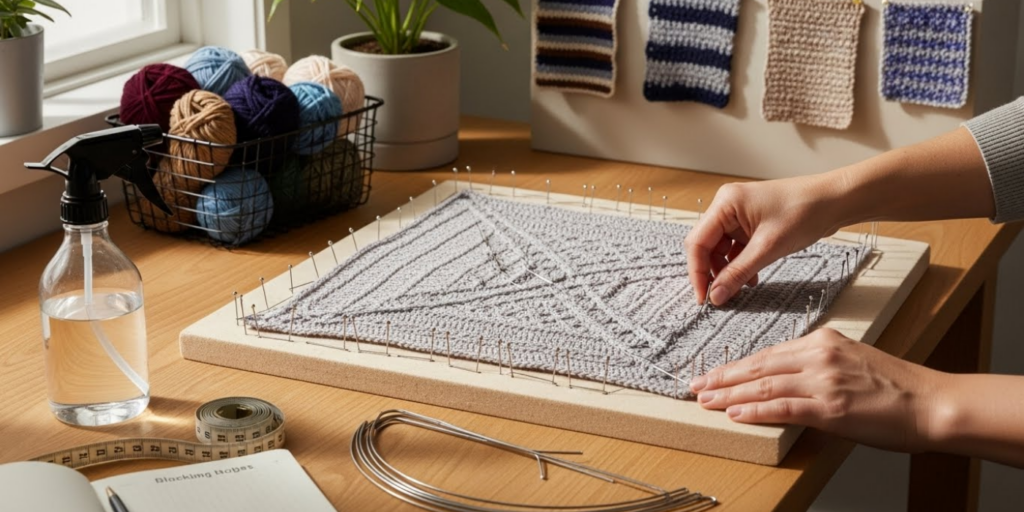
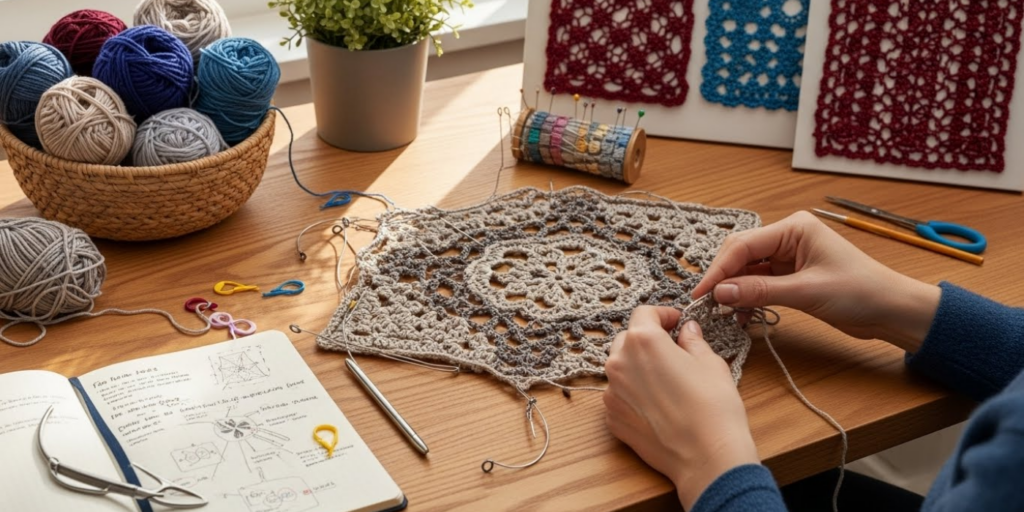
Mastering Wet Blocking: Precision Shaping for Lace and Plant Fibers
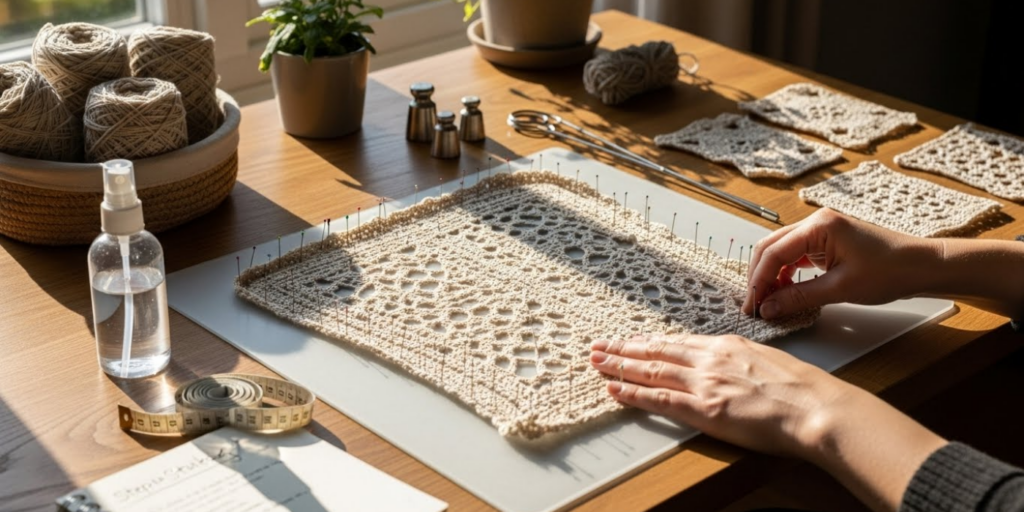
Wet blocking is the gold standard for lace, openwork, and plant-based yarns like cotton, linen, and bamboo. These fibers have little memory, so they need full saturation to “set” into their new shape.
Step-by-Step Precision Method:
- Soak your piece in lukewarm water with a no-rinse wool wash (even for cotton—it softens fibers) for 20–30 minutes.
- Gently press out water—never wring! Roll in a clean, absorbent towel and stomp or press to remove excess moisture.
- Lay flat on a blocking mat (interlocking foam tiles work great).
- Pin every key point: corners, scallops, increase/decrease lines. Use blocking wires for smooth, professional edges on shawls.
- Measure against your pattern schematic—use a ruler to ensure symmetry and correct dimensions.
- Let dry completely (24–72 hours). Do not rush!
Pro Tips:
- For large shawls, pin the center first, then work outward to avoid distortion.
- Use quilting rulers to keep straight edges perfectly perpendicular.
- For circular motifs, pin from the center outward in even increments (e.g., every 2 inches).
Why it works: Wet blocking relaxes fibers so they can be reformed. Once dry, plant fibers “lock” into place—permanently.
Steam Blocking with Surgical Control: For Wool, Blends, and Garments
Steam blocking is ideal for elastic fibers like wool, alpaca, and wool blends. It’s faster than wet blocking and perfect for garments, seams, or projects you can’t fully submerge.
Advanced Technique: Targeted Steam Sculpting
- Pin your piece lightly into shape on a heat-safe surface (never foam—it melts!).
- Use a garment steamer (safer than an iron) and hold it 3–4 inches above the fabric.
- Steam in sections, gently stretching or smoothing as needed.
- For seams: place the seam face-down, steam, then press lightly with your fingers to flatten.
- Let cool completely before removing pins.
When to Use It:
- Seam alignment: Steam each piece before sewing to ensure matching gauge.
- Correcting minor curling: A light steam can flatten stockinette edges without full wet blocking.
- Refresh between wears: Gently steam a sweater to restore shape without washing.
Caution: Never steam acrylic, silk, or synthetic blends without testing first—high heat can melt or weaken fibers.
Cold Blocking (Spray Method): The Gentle Approach for Delicates
Cold blocking—misting with water—is the safest method for acrylic, novelty yarns, or projects with embellishments (like beads or sequins) that can’t get wet.
How to Do It Right:
- Pin your item into shape.
- Use a fine-mist spray bottle filled with distilled water (prevents mineral spots).
- Mist until evenly damp—not soaked.
- Let dry completely.
While it won’t dramatically reshape dense fabrics, it’s perfect for:
- Squaring granny squares
- Smoothing slight curling on scarves
- Refreshing stored items that lost their shape
Key insight: Acrylic doesn’t “hold” blocking like wool—but consistent cold blocking after every wash helps maintain shape over time.
Fiber-Specific Strategies: One Size Does NOT Fit All
Your blocking method must match your fiber content, not just your project type.
- Wool & Animal Fibers: Respond beautifully to wet and steam blocking. They felt slightly when wet-blocked, which enhances stitch definition.
- Cotton/Linen/Bamboo: Require wet blocking to drape properly. They don’t bounce back, so shape is permanent once dry.
- Acrylic: Can’t be truly “blocked,” but steam sets temporary shape. Avoid high heat.
- Silk: Delicate! Use only light cold blocking. Steam can dull its sheen.
- Blends: Go by the dominant fiber (e.g., 60% cotton/40% acrylic = treat as cotton).
Pro Tip: Always block a swatch first. See how your specific yarn reacts before committing your entire project.
Specialized Techniques for Challenging Projects
Now, let’s apply these methods to real-world scenarios.
🧣 Lace Shawls: Achieve Gallery-Quality Results
- Use blocking wires along all edges for razor-sharp points.
- Stretch to 70–80% of max tension—overstretching distorts lace.
- Pin every yarn-over hole to open the pattern fully.
- Allow extra drying time—lace holds moisture longer.
👕 Tailored Garments: Fit and Finish Like a Pro
- Block each piece separately before seaming.
- Use dress forms or mannequins for 3D shaping (e.g., for bust darts or sleeve caps).
- After seaming, give the whole garment a light steam to unify the fabric.
🧶 Granny Squares & Motifs: Uniformity at Scale
- Block every square identically—even if they look similar.
- Use a granny square blocking board with pre-measured grids.
- For large blankets, block in 2×2 or 3×3 sections to maintain alignment.
🧸 Amigurumi & 3D Items: Shape Without Damage
- Never wet-block (stuffing gets soggy!).
- Use localized steam: gently steam only the areas needing smoothing (like ears or limbs).
- Reshape while warm, then let cool completely.
Essential Tools for Professional Results
You don’t need expensive gear, but these tools make advanced blocking effortless:
✅ Interlocking foam mats – waterproof, pin-friendly, modular
✅ Rust-proof T-pins or lace pins – fine, strong, won’t stain
✅ Stainless steel blocking wires – for smooth shawl edges
✅ Quilting rulers & measuring tape – for precision symmetry
✅ Garment steamer – safer and more even than an iron
✅ No-rinse wool wash – adds softness and removes spinning oils
Many are affordable and reusable—think of them as an investment in your craft’s professionalism.
Common Mistakes (and How to Avoid Them)
Even experts slip up. Watch out for:
🚫 Overstretching lace – it can distort stitch definition. Stretch just enough to open the pattern.
🚫 Blocking acrylic like wool – it won’t hold shape the same way. Adjust expectations.
🚫 Skipping blocking on garments – seams will never align perfectly without it.
🚫 Using rusty pins – they can stain light-colored yarns permanently.
🚫 Rushing drying – never use a hairdryer. It can warp fibers or cause mildew if the inside stays damp.
Remember: Patience is part of the process. Let your project dry naturally—it’s worth the wait.
Final Thoughts: Blocking as an Act of Love
At its core, advanced blocking isn’t just technique—it’s a final act of care for your creation. Every stitch you made deserves to be seen at its best. Blocking honors the time, creativity, and intention you poured into your project.
Whether you’re making a gift, selling your work, or creating a personal heirloom, taking that extra hour to block properly shows you care—not just about the craft, but about the person who will wear or use it.
So next time you bind off, don’t stop there. Reach for your pins, your spray bottle, or your steamer. Your project isn’t finished until it’s blocked.
Have you tried advanced blocking before? Did it transform a project you thought was “good enough”? Share your before-and-after stories in the comments—we’d love to celebrate your success! And if you found this guide helpful, please share it with a fellow maker who’s ready to elevate their finishing game.
Happy blocking—and even happier wearing!

Maria Santos is a dedicated crochet and knitting enthusiast who finds joy in turning simple strands of yarn into meaningful, handmade art. With a natural eye for detail and a deep love for fiber crafts, she brings warmth, creativity, and years of personal experience to every project. Maria is inspired by the stories woven into each stitch and loves sharing that passion with others.


