If you’ve ever ripped out an entire project because your blanket turned out wider on one end, or your sweater sleeves didn’t match, you’re not alone. One of the most frustrating—and preventable—mistakes in crochet boils down to one simple skill: knowing how to count your stitches and rows accurately.
It sounds basic, but even experienced crocheters can lose track, especially when working with complex patterns, textured stitches, or dark yarns. The good news? Counting doesn’t have to be guesswork. With a few reliable techniques and a little mindfulness, you can eliminate sizing errors, save hours of frogging (that’s “rip it, rip it” in crocheter-speak!), and gain confidence in every project you make.
In this guide, you’ll learn how to count crochet stitches and rows correctly across the most common stitch types, including chain stitches, single crochet, double crochet, and more. We’ll also cover pro tips for tricky situations—like working in the round, counting with fuzzy yarn, or tracking rows without a row counter. Whether you’re making a baby blanket, a sweater, or amigurumi, mastering this foundational skill will transform your results—and your enjoyment of the craft.
Why Counting Stitches and Rows Matters More Than You Think
At first glance, counting might seem like a beginner’s chore—something you outgrow once you “get the hang” of crochet. But that’s a myth. Accurate stitch and row counts are essential for:
- Matching pattern instructions (so your garment fits!)
- Maintaining consistent width and shape
- Joining pieces seamlessly (hello, matching granny squares!)
- Troubleshooting mistakes early—before they compound
Imagine you’re crocheting two sleeves for a cardigan. If one has 42 rows and the other has 45, they won’t align at the shoulder. Or if you accidentally add a stitch every few rows, your scarf will flare out like a trumpet. These aren’t just “oops” moments—they’re the difference between a handmade treasure and a project abandoned in the WIP pile.
Real-life example: Sarah, an intermediate crocheter, spent weeks on a lace shawl—only to discover at the border that the edges didn’t align because she’d miscounted foundation chains. A 2-minute stitch check at the start would’ve saved her 20 hours of work.
So don’t skip the count. It’s not about doubt—it’s about precision, pride, and peace of mind.
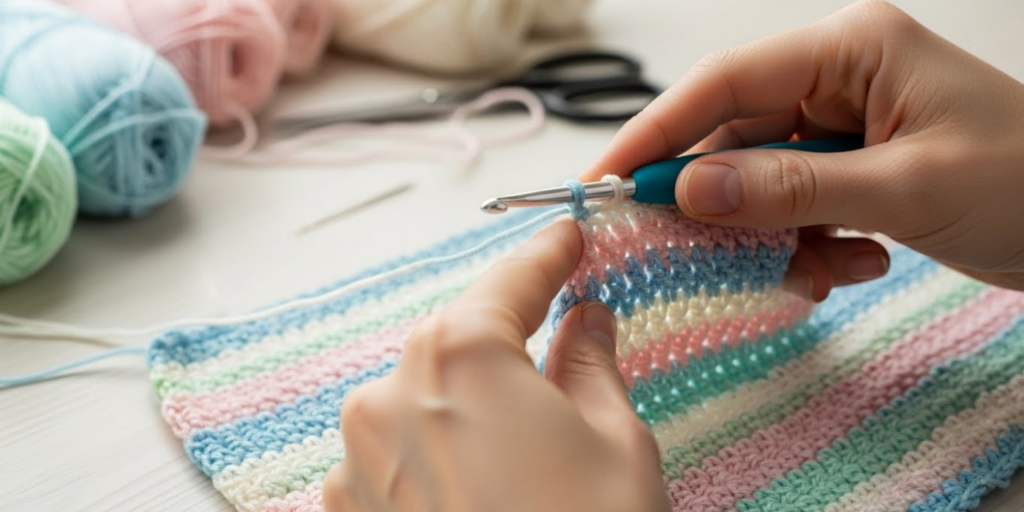
How to Count Stitches in the Most Common Crochet Stitches
The key to counting is knowing which part of the stitch to look at. Each stitch type has a “signature” shape that makes counting possible—even in dense fabric.
📌 Chain Stitches (ch)
Chain stitches form a “V” on the front and a bumpy ridge on the back.
✅ How to count: Count the “V” shapes along the top edge, excluding the loop on your hook and including the turning chain if it counts as a stitch (check your pattern!).
⚠️ Tip: Place a stitch marker in the first chain to avoid double-counting.
📌 Single Crochet (sc)
Each sc looks like a little “post” with a top that resembles a chain “V.”
✅ How to count: Count the top “V”s across the row. Ignore the posts—they can be misleading.
🔍 Pro trick: Use a yarn needle or stitch marker to poke through each “V” as you count to avoid skipping or repeating.
📌 Half Double Crochet (hdc)
Hdc stitches have a distinctive three-loop top (the front loop, back loop, and a third “hidden” loop).
✅ How to count: Count the two visible top loops (the “V”)—just like sc. The third loop isn’t part of the stitch count unless your pattern specifies it.
📌 Double Crochet (dc) and Taller Stitches
Taller stitches like dc, treble (tr), etc., have a clear “V” at the top and a diagonal “braid” down the front.
✅ How to count: Again, focus only on the top “V”s. It doesn’t matter how tall the stitch is—the count is always at the top edge of the row.
💡 Visual aid: Lay your work flat. Tilt it slightly toward a light source—the “V”s will cast subtle shadows, making them easier to see.
Bonus: When working in turned rows, remember: your count should include the turning chain only if the pattern says it “counts as a stitch.” Most modern patterns specify this clearly.
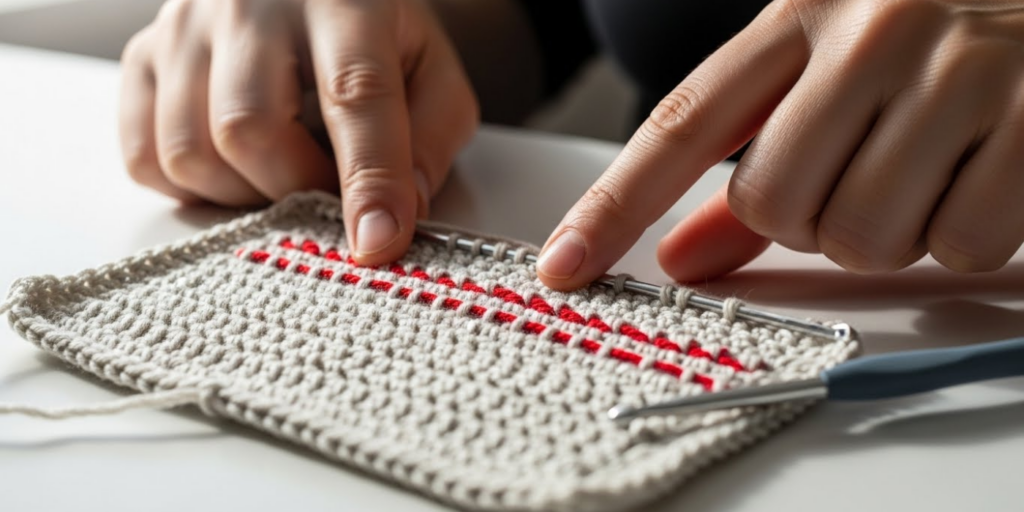
How to Count Rows Accurately—Even When It’s Tricky
Counting rows is often harder than counting stitches, especially in textured patterns or dark yarns. But there’s a universal method that works for almost all stitch types:
✅ Look at the side (edge) of your work. Each row creates a horizontal “ridge” or “post” along the edge.
✅ Count each ridge as one row—from the bottom up, excluding the foundation chain.
Examples by stitch type:
- Single crochet: Each row looks like a clean horizontal bar along the side.
- Double crochet: Rows appear as diagonal lines or stacked “braids”—but each full “unit” = one row.
- Ribbed or post stitches: Even with front/back post stitches, the edge will show a clear row-by-row progression.
Common mistake: Counting the loops on the hook or the foundation chain as a row. Remember: the foundation chain is not a row—your first row of actual stitches is Row 1.
What if your yarn is fuzzy, dark, or slippery?
- Use a contrasting safety pin or bobby pin to mark every 10th row as you go.
- Take a photo and zoom in—you’ll be surprised how clear the rows become on screen!
- Feel the fabric: Sometimes you can feel the ridges with your fingertips better than you can see them.
Special Situations: Counting in the Round, Lace, and Amigurumi
Not all projects are flat rectangles. Here’s how to count when things get curvy or lacy.
🌀 Working in the Round (Hats, Amigurumi, Doilies)
- Spiral rounds (no join): Place a stitch marker in the first stitch of each round. Move it up as you begin each new round. To count rounds, count the number of times the marker has moved.
- Joined rounds: Each slip stitch + chain counts as the end of one round. Count the horizontal “rings” from the center outward.
Pro tip for amigurumi: Miscounting rounds in a sphere can make your teddy bear lopsided. Always count after every round—better safe than sorry!
🕸️ Lace and Openwork Patterns
Lace uses chains and clusters, which can look chaotic.
- Focus on the pattern repeat: Most lace charts repeat every X stitches and Y rows. Count one full repeat, then multiply.
- Use locking stitch markers to mark the start and end of each repeat section.
- Count the “solid” stitches only—chains between them usually aren’t counted as stitches.
📏 Gauge Swatches
When testing gauge, count both stitches and rows over 4 inches (10 cm).
- Use straight pins to mark the exact 4″ area.
- Count the “V”s between the pins—not including partial stitches at the edges.
- This ensures your finished garment will match the pattern’s intended size.
Tools and Habits That Make Counting Effortless
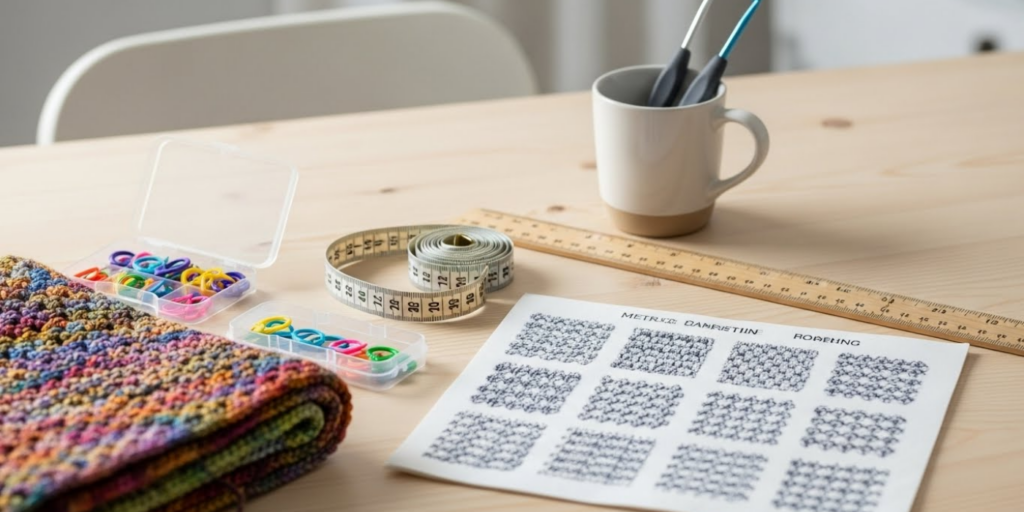
You don’t need fancy gadgets—but a few simple tools can be game-changers:
🔹 Stitch markers (locking or split-ring): Mark the beginning of rows or every 10th stitch.
🔹 Row counters (manual or app-based): Clip-on counters or apps like Crochet Chart track rows automatically.
🔹 Tally sheets: Keep a notepad nearby and make a hash mark every time you finish a row.
🔹 Highlighters: If working from a printed pattern, highlight each row as you complete it.
Build these habits:
- Count at the end of every row or round—don’t wait until you “notice a problem.”
- Count twice: Once when you finish, and once before you start the next row.
- Say the numbers out loud as you count—this engages your brain and reduces errors.
Analogy: Counting stitches is like checking your speedometer while driving. You don’t wait until you’re lost to look—you check often to stay on course.
Troubleshooting: What to Do When Your Count Is Off
Even with perfect technique, mistakes happen. If your stitch count doesn’t match the pattern:
- Don’t panic—and don’t keep going. Continuing will only compound the error.
- Count again slowly, using a needle to point to each stitch.
- Check common trouble spots:
- Did you skip the first stitch? (A frequent mistake!)
- Did you work two stitches into the last stitch?
- Did your turning chain count as a stitch when it shouldn’t (or vice versa)?
- If you’re only 1–2 stitches off, you can often adjust gradually over the next few rows—but only if the pattern allows.
- When in doubt, frog it. It’s frustrating, but a small rip now saves a big mess later.
Encouragement: Even professional designers miscount sometimes. What matters is that you catch it early and learn from it.
Final Thoughts: Counting Is Part of the Craft—Not a Chore
Counting stitches and rows isn’t a sign that you’re “not good enough” at crochet—it’s a sign that you care about your work. It’s how you honor the time, yarn, and creativity you’ve invested. And with practice, it becomes second nature—so seamless you won’t even think about it.
Remember: every perfectly shaped blanket, every symmetrical garment, every amigurumi with matching ears started with someone who took a moment to count carefully.
So the next time you pick up your hook, give yourself permission to slow down. Count your stitches. Count your rows. Celebrate the precision. Your future self—and your finished project—will thank you.
Now it’s your turn! What’s your biggest challenge when counting stitches or rows? Do you have a favorite trick that works for you? Share your tips in the comments below—your insight might be the missing piece another crocheter needs! 🧶✨

Maria Santos is a dedicated crochet and knitting enthusiast who finds joy in turning simple strands of yarn into meaningful, handmade art. With a natural eye for detail and a deep love for fiber crafts, she brings warmth, creativity, and years of personal experience to every project. Maria is inspired by the stories woven into each stitch and loves sharing that passion with others.


