Imagine pulling a one-of-a-kind sweater from your closet—not just any sweater, but one you designed, stitch by stitch, color by color, with your own hands. It fits you perfectly. It tells your story. And no one else in the world has anything like it.
That’s the magic of designing custom crochet garments from scratch.
In a world flooded with fast fashion and mass-produced clothing, there’s something deeply empowering about creating wearable art that reflects your personality, body, and values. Whether you’re a seasoned crocheter looking to level up or a complete beginner who’s ever dreamed of making your own clothes, this guide will walk you through the entire process—from spark of inspiration to the final stitch—with clarity, heart, and zero jargon.
We’ll explore how to translate your vision into a tangible design, choose the right yarn and tools, understand body measurements (yes, it’s easier than you think), and avoid the common pitfalls that derail even the most enthusiastic makers. You’ll learn how to sketch your ideas, build a simple pattern, and adjust as you go—no formal training required.
And here’s the best part: you don’t need to be a professional to create something beautiful. Every expert crocheter started right where you are now—with a hook, some yarn, and a dream.
Let’s dive in.
1. Where It All Begins: Finding Your Design Inspiration
Before you pick up your hook, you need to know why you’re making this garment.
Is it a cozy oversized cardigan for chilly mornings? A bold, colorful crop top for summer festivals? A lace-trimmed shawl that feels like wearing a sunset? Your inspiration is your compass.
Start by asking yourself: What do I wish I could buy, but never find in stores?
Maybe it’s a sleeveless top with just the right amount of drape. Or a jacket with pockets deep enough for your phone, keys, and a small notebook. Maybe you’ve always loved the look of vintage crochet but want it in modern, neutral tones. These desires are your design seeds.
Look around you. Flip through fashion magazines (even digital ones). Scroll Pinterest boards labeled “crochet fashion” or “slow fashion.” Watch YouTube videos of designers sketching their ideas. Pay attention to what makes your heart skip—a certain stitch pattern, a unique neckline, the way light filters through delicate lace.
I remember a client named Lena who came to me frustrated after buying three “crochet dresses” that all fell apart after one wash. She wanted something elegant but durable. One day, she showed me a photo of her grandmother’s lace doily—delicate, timeless, and handmade. That became the foundation of her custom wrap dress. She used a tighter stitch and cotton blend yarn. It lasted five years. And she wore it to her daughter’s wedding.
Your inspiration doesn’t have to be grand. It just has to be yours.
Pro tip: Keep a “design journal”—even if it’s just a notes app on your phone. Snap photos, jot down colors you love, sketch rough shapes. Over time, patterns emerge. You’ll start seeing your personal style in action.
And remember: you’re not copying. You’re conversing with fashion—taking elements you love and making them your own.
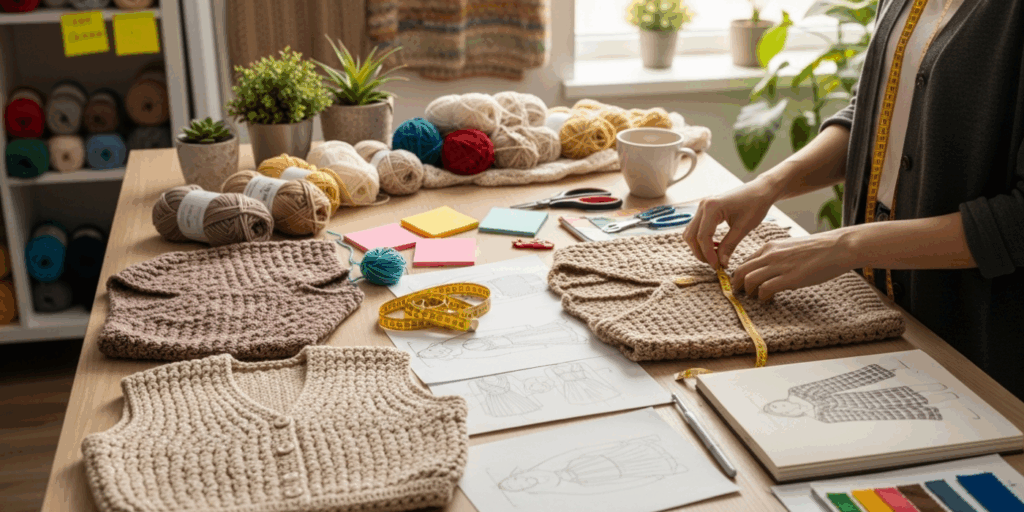
2. The Secret Weapon: Measuring Yourself (Yes, Really!)
Here’s the truth: most homemade garments fail not because of bad technique—but because of bad measurements.
You wouldn’t buy shoes without knowing your size. Why treat clothing any differently?
The good news? You don’t need a tailor’s tape or a professional fitting. Just a flexible measuring tape (or even a piece of string and a ruler), a mirror, and 10 minutes.
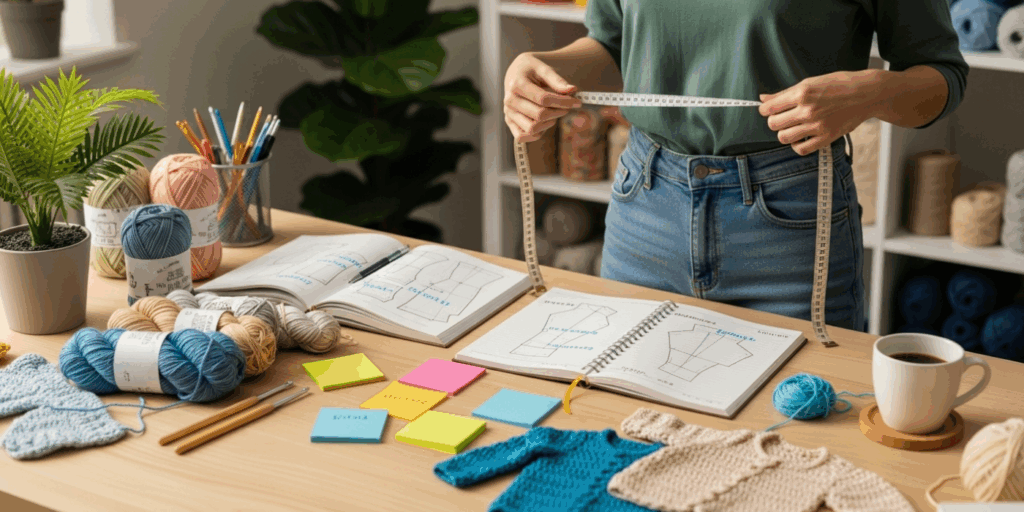
Start with these five key measurements:
- Bust/Chest: Measure around the fullest part, keeping the tape level.
- Waist: Find your natural waist (usually where you bend side to side).
- Hips: Measure around the fullest part of your hips and buttocks.
- Length: From your shoulder to where you want the garment to end (e.g., waist, hip, mid-thigh).
- Sleeve: From shoulder to wrist (or desired sleeve length).
Write these down. Then, compare them to a garment you already love and fit perfectly. That’s your “go-to” reference.
Now, here’s the magic trick: gauge swatches.
Before you start your whole project, make a 4×4 inch square using the yarn and hook you plan to use. Count how many stitches and rows fit in that square. That’s your gauge. If your gauge is off, your finished piece could be too tight, too loose, or even two sizes smaller than you expected.
I once made a stunning lace shawl for my sister—only to realize halfway through it was 18 inches too short because I didn’t check my gauge. Lesson learned. The hard way.
Pro tip: Use stitch markers to keep track of your swatch. Take a photo of it. Write the yarn brand, hook size, and stitch pattern on the back. Keep it in your project bag. You’ll thank yourself later.
And if you’re unsure? Start small. Make a scarf or a hat first. Get comfortable with your tension. Then scale up.
Your body is unique. Your garment should be too.
3. From Sketch to Stitch: Building Your First Pattern (No Math Degree Needed)
You’ve got your inspiration. You’ve got your measurements. Now what?
Time to turn your vision into a pattern.
Don’t panic. You don’t need to write a 10-page technical document. Think of it like giving instructions to a friend who’s never crocheted before.
Start simple.
Let’s say you want a cropped top with puff sleeves and a ribbed hem. Break it down:
- Body: A rectangle from underarm to waist.
- Sleeves: Two tapered ovals.
- Neckline: A curved edge at the top.
- Hem: A few rows of single crochet for stretch.
Sketch this out on paper. Don’t worry about being artistic. Stick figures are fine. Label each part.
Now, use your gauge to calculate how many stitches you need.
Example: If your gauge is 5 stitches per inch, and your bust is 36 inches, you’ll need roughly 180 stitches across (36 x 5). Round to the nearest multiple of your stitch pattern (e.g., if you’re using a 4-stitch repeat, round to 180 or 176).
Use free online tools like Ravelry’s Pattern Calculator or Crochet Pattern Generator (search online—they’re free!) to help with the math. Or just grab a calculator and do it step by step.
Then, write your pattern like a recipe:
Row 1: Chain 180. Double crochet in 4th chain from hook. Dc in each stitch across. Turn.
Row 2: Ch 3 (counts as dc), dc in each stitch across. Turn.
Repeat Row 2 until piece measures 12 inches from shoulder.
Keep it clear. Keep it simple.
Pro tip: Always write your pattern as you go. Even if you’re making it up as you crochet, jot down what you did. You’ll be able to recreate it—or make a size L next time.
And here’s the secret: most custom garments are made in pieces. Back, front, sleeves. Then you sew them together. It’s way easier than trying to crochet a whole outfit in the round.
You’re not building a skyscraper. You’re assembling a puzzle.
4. Choosing the Right Yarn: It’s Not Just About Color
Yarn is the soul of your garment.
You can have the most beautiful design, but if your yarn is too slippery, too itchy, or stretches out after one wear, your masterpiece becomes a regret.
Here’s the golden rule: match the yarn to the purpose.
- For everyday wear: Choose cotton, bamboo, or linen blends. They’re breathable, durable, and machine washable.
- For warmth: Wool or alpaca blends. Great for winter sweaters, but may require hand washing.
- For drape and flow: Silk blends or rayon. Perfect for shawls and flowy tops.
- For beginners: Medium-weight (worsted) acrylic. Affordable, easy to fix mistakes, and widely available.
Avoid novelty yarns (like fluffy or metallic) for your first garment—they’re tricky to work with and don’t hold shape well.
Also, check the label for care instructions. If you hate hand-washing, pick something machine washable. If you sweat a lot, avoid synthetic fibers that trap odor.
And don’t underestimate color. Light colors show every stitch—and every mistake. Dark colors hide imperfections but can make fine details hard to see. Mid-tone neutrals (taupe, sage, oatmeal) are forgiving and timeless.
I once made a bright fuchsia top for a friend’s birthday. She loved it… until she tried to wear it to the grocery store. Everyone stopped her to ask where she bought it. She ended up wearing it to three weddings and a job interview. It became her signature piece.
Color isn’t just aesthetic—it’s identity.
Pro tip: Buy an extra skein of your main yarn. Always. You’ll thank yourself when you realize you need 3 more rows and the dye lot changed.
5. The Art of Adjusting: Embrace Imperfection
Here’s the truth no one tells you: your first custom garment won’t be perfect.
And that’s okay.
Crochet is forgiving. If a sleeve is too tight? Add a few more stitches in the next row. If the hem curls? Block it. (Yes, you can block crochet garments—it’s like giving them a spa day.)
Don’t be afraid to rip out and restart. That’s not failure. That’s refinement.
I’ve had students cry because they thought they’d “wasted” 20 hours on a sweater that didn’t fit. I showed them how to unravel it, reuse the yarn, and try again—with better measurements and a new plan. The second version? Better than anything they’d ever bought.
The key is to design with flexibility.
- Use reversible stitches so both sides look good.
- Add button bands or ties instead of fixed closures.
- Design with ease—don’t make it skin-tight unless that’s your goal.
Think of your garment as a conversation between you and your materials. Sometimes it speaks back in unexpected ways. Listen.
And remember: handmade doesn’t mean flawless. It means human. Slight asymmetries? That’s your fingerprint on the fabric.
6. Finishing Touches: Where Magic Happens
The final 10% of your work is what turns a project into a treasure.
This is where you:
- Weave in all ends (yes, every single one). Use a yarn needle. Take your time.
- Block your garment. Wet it gently, lay it flat on a towel, shape it to your measurements, and let it dry. This smooths out stitches and gives your piece professional polish.
- Add buttons, fringe, or embroidery. A single button at the collar. A row of tiny tassels. A hand-stitched flower. These are the details that make it yours.
- Wash and care for it properly. Follow the yarn label. Fold, don’t hang, to prevent stretching.
And here’s a little secret: wear it before you show it.
Put it on. Walk around your house. Sit down. Stretch your arms. Does it feel good? Does it move with you? If not, tweak it now.
This isn’t just clothing. It’s an extension of your body and your spirit.
When you finish your first custom garment, take a photo. Not for Instagram. For you. Look at it. Feel it. Say, “I made this.”
That moment? That’s worth more than any store-bought item.
Conclusion: Your Hands, Your Story
Designing custom crochet garments from scratch isn’t about becoming a fashion designer.
It’s about reclaiming your relationship with clothing.
In a world that tells us to buy more, wear faster, and replace often, choosing to make something slow, thoughtful, and uniquely yours is a quiet act of rebellion. It’s self-care. It’s creativity. It’s connection—to your hands, your body, and your history.
You don’t need expensive tools. You don’t need a degree. You just need a hook, some yarn, and the courage to begin.
Every stitch you make is a declaration: I am capable. I am creative. I matter.
So go ahead—sketch that top you’ve been dreaming about. Measure your waist. Pick that color that makes you smile. Start that first row.
And when you wear it for the first time?
You won’t just be wearing a garment.
You’ll be wearing your story.
Your Turn:
What’s the first custom crochet garment you want to make? A cozy cardigan? A bold crop top? A lace-trimmed dress? Drop your idea in the comments below—I’d love to cheer you on. And if you’ve already made something handmade, share a photo. Let’s build a community of makers who choose slow, meaningful fashion—one stitch at a time.
Happy hooking. 🧶

Maria Santos is a dedicated crochet and knitting enthusiast who finds joy in turning simple strands of yarn into meaningful, handmade art. With a natural eye for detail and a deep love for fiber crafts, she brings warmth, creativity, and years of personal experience to every project. Maria is inspired by the stories woven into each stitch and loves sharing that passion with others.


