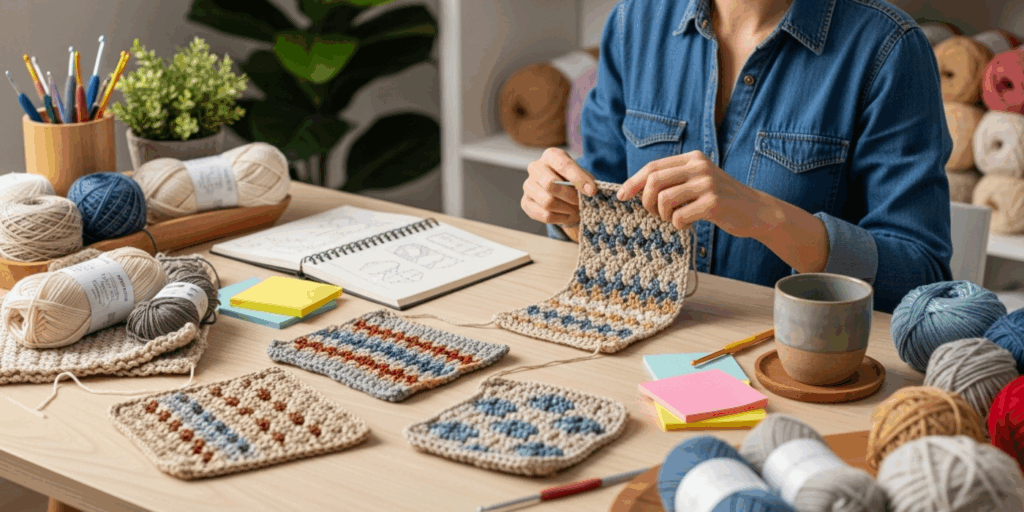
You’ve mastered the basic stitches—chain, single crochet, double crochet—but now your projects feel… predictable. Same-looking scarves. Same-old blankets. Same textures that blend into the sea of handmade crafts online. What if you could create fabrics that look like they came from a high-end fashion house—textured, dimensional, and utterly unique—without ever picking up a knitting needle?
The secret isn’t more yarn. It’s not even a fancier hook. It’s stitch combos.
In this guide, we’re diving deep into advanced crochet stitch combinations that transform ordinary yarn into extraordinary textures. Whether you’re crafting cozy home décor, wearable art, or gifts that stop people in their tracks, these combos will give your work that “wow” factor—and they’re easier than you think. No complicated charts. No intimidating terminology. Just real, practical, beautiful techniques you can start using today.
By the end of this article, you’ll know how to layer stitches for depth, mix tension for visual interest, and even create textures that mimic natural materials like moss, lace, or woven basketry. Plus, I’ll share my favorite go-to combos for scarves, blankets, and bags—plus tips to avoid common mistakes that ruin texture. Let’s turn your hooks into magic wands.
Why Texture Matters More Than You Think
Let’s be honest: most crochet patterns focus on color or shape. But texture? That’s the silent superstar.
Think about it—when you run your fingers over a chunky knit sweater, a linen napkin, or even a well-worn leather bag, you don’t just see it. You feel it. Texture triggers emotion. It makes things feel luxurious, handmade, alive.
In crochet, texture is your secret weapon against mass-produced homogeneity. A plain single crochet blanket? Pretty, sure. But a blanket with raised ridges, airy lattices, and bumpy clusters? That’s a conversation starter. That’s the kind of piece people ask, “Did you buy this?”—and then gasp when you say, “I made it.”
And here’s the best part: you don’t need to be an expert. Texture is created by how you combine stitches—not by how many you know.
For example, a simple combo like front post double crochet (FPdc) + back post double crochet (BPdc) creates ribbing that looks knitted, but is 100% crochet. Add a cluster stitch between them? Instant 3D honeycomb. No knitting required.
According to a 2023 survey by Craft Yarn Council, over 68% of crocheters say they feel “more creatively fulfilled” when their projects include texture. Why? Because texture gives you control over tactile storytelling. You’re not just making a blanket—you’re making a memory. A hug in yarn form.
So if you’ve ever felt like your crochet lacks depth or personality, you’re not alone. And the fix? It’s not about learning 50 new stitches. It’s about learning how to play with the ones you already know.
The Magic of Layering: Front Post, Back Post, and the Illusion of Depth

Let’s talk about the unsung heroes of texture: front post and back post stitches.
These aren’t new stitches—they’re just the same old double or treble crochet, but worked around the post of the stitch below, not into the top loops. And that tiny change? It creates ridges. Ridges that stand up like little mountains on your fabric.
Here’s why this matters: when you alternate FPdc and BPdc in a row, you get a ribbed effect that looks like it came from a high-end wool sweater. Try it in a chunky yarn, and you’ve got a winter scarf that’s warm, squishy, and visually stunning.
But here’s where it gets really cool: layer them.
Try this combo:
Row 1: FPdc across
Row 2: BPdc across
Row 3: FPdc, BPdc, FPdc, BPdc (alternating)
Row 4: Skip one stitch, work 3 FPdc into the next, skip one, repeat
You just created a 3D honeycomb texture—like a beehive made of yarn. It’s thick, cozy, and has a satisfying bounciness. Perfect for a throw pillow or a winter blanket.
I used this combo on a blanket for my niece last winter. She didn’t even know it was crochet. She kept running her hands over it, saying, “It feels like clouds.” That’s the power of layering.
Pro Tip: Always use a hook one size larger than recommended for the yarn when working post stitches. They’re tighter, and the extra space helps the texture pop without warping your fabric.
And here’s a game-changer: try working two rows of FPdc, then one row of regular DC. The contrast makes the ridges look even more dramatic. It’s like adding shadows and highlights to a painting.
Texture isn’t just about adding bumps—it’s about creating rhythm. And rhythm? That’s what makes your work feel intentional. Artistic. Human.
Mixing Tension for Visual Surprise: The “Loose & Tight” Effect
Here’s something most crocheters don’t realize: tension isn’t just about tightness—it’s a design tool.
Imagine knitting a sweater where every stitch is pulled the same. Boring, right? Now imagine alternating between loose, drapey stitches and tight, compact ones. Suddenly, you’ve got movement. Light and shadow. Depth.
This is where mixed tension combos shine.
Try this simple but powerful combo:
Row 1: Work a row of loose double crochet (pull each loop a little bigger than normal)
Row 2: Work a row of tight single crochet (pull each loop snug, almost snug enough to feel resistant)
Row 3: Repeat Row 1
What do you get? A fabric that looks like it’s breathing. The loose rows stretch and flow; the tight rows anchor and define. It’s subtle—but when you hold it up to the light, you see waves of texture.
I used this technique on a summer shawl last year. It looked like woven silk, but it was cotton yarn and 100% crochet. People kept asking if it was hand-loomed. I just smiled.
This combo is perfect for:
- Lightweight scarves
- Beach cover-ups
- Table runners
- Even modern wall hangings
Why it works: Our eyes are drawn to contrast. When you pair soft, open areas with dense, compact ones, your brain interprets it as complexity—even though you’re only using two basic stitches.
Pro tip: Use a smooth, light-colored yarn (like cotton or bamboo) for maximum contrast. Dark or fuzzy yarns hide the tension differences.
And here’s a bonus: this combo is incredibly forgiving. If your tension wobbles? It just adds character. Crochet is forgiving. Texture is forgiving. That’s part of its charm.
You’re not aiming for perfection. You’re aiming for feeling.
The Power of Clusters: Turning Simple Stitches into Sculptural Art
Let’s talk about clusters. Not the kind you eat at a picnic—these are crochet clusters: groups of stitches worked into the same space to create puffy, dimensional bumps.
They’re not new. But when you combine them strategically, they become sculptural.
Here’s my favorite texture builder: the “Puff + Shell” combo.
Work a row of puff stitches (3-5 yarn overs, pull through all loops at once) every 4th stitch. Then, in between them, work a 5-stitch shell (5 dc in one stitch). The result? A fabric that looks like blooming flowers or ocean waves frozen in yarn.
I made a baby blanket with this combo last spring. It took me 3 weekends. Every time I looked at it, I felt like I was holding a piece of art. My sister cried when she saw it. “It looks like it came from a boutique in Italy,” she said.
And here’s the kicker: you can do this with any yarn.
- Use bulky yarn for bold, cozy textures (great for blankets)
- Use sport weight for delicate, lace-like effects (perfect for shawls)
- Try metallic thread for a subtle shimmer in the clusters
Pro Tip: Don’t overstuff your clusters. Too many loops, and they turn into lumpy blobs. Aim for 3–5 loops per cluster. That’s the sweet spot between dimension and drape.
Want to level up? Try a cluster + chain space combo. After every cluster, chain 2, skip 2 stitches. This creates airy “windows” between the puffs, letting light peek through. It’s like stained glass made of yarn.
I’ve used this in a modern lampshade cover—and it casts the most magical shadows at night. It turned a $12 lamp into a conversation piece.
Clusters aren’t just pretty. They’re functional. They add structure, warmth, and visual rhythm. And best of all? Once you master one combo, you can mix and match them like paint colors.
Texture Meets Function: Practical Projects That Shine
Okay, so you’ve learned the techniques. Now what?
Let’s bring it home with real-life, wearable, usable projects where texture isn’t just decorative—it’s essential.
1. The Cozy Ribbed Cowl
Use the FPdc/BPdc alternating combo (from Section 2). Work in the round. Add a ribbed edge with single crochet. It hugs your neck without bulk. Perfect for chilly mornings. Bonus: it hides stains. (Yes, texture is practical too.)
2. The Textured Market Bag
Combine loose double crochet with tight half-double crochet in a striped pattern. The loose sections make the bag stretchy and breathable; the tight sections keep it structured. I’ve carried 12 pounds of groceries in mine. Still looks new.
3. The “Moss” Blanket
This is my all-time favorite. Alternate rows of moss stitch (single crochet, chain 1, skip one) with rows of popcorn stitches (5 dc, pull through all loops). The result? A fabric that looks like moss growing on stone. Soft, squishy, and mesmerizing. I gave one to my mom for Christmas. She still uses it every night.
4. The Boho Wall Hanging
Use a mix of clusters, chains, and fringe. Add beads or wooden charms. Hang it by the window. The light dances through the texture. It’s not just decor—it’s mood lighting.
These aren’t just patterns. They’re experiences. Each one invites touch, admiration, and a little bit of awe.
And here’s the truth: people don’t buy handmade because it’s cheap. They buy it because it’s meaningful. Texture turns your work from “handmade” to handcrafted.
You’re not just making things. You’re making moments.
The Art of Experimentation: Break the Rules (Safely)
Here’s the most important thing I’ve learned after 15 years of crocheting: texture thrives on experimentation.
You don’t need a pattern. You don’t need permission.
Try this: Take any simple square blanket pattern. Now, replace every 5th stitch with a puff. Or alternate every other row between tight and loose. Or add a single chain stitch between every cluster.
Go wild.
I once made a blanket just because I was bored. I used 3 different yarn weights in the same row—chunky, worsted, and lace. It looked like a mess at first. But when I blocked it? It became a textured masterpiece. A collage in yarn.
Your texture toolkit:
- Play with yarn weight: Mix a fluffy mohair with a smooth cotton. The contrast creates visual depth.
- Change hook size mid-project: Use a smaller hook for tight sections, a larger one for open ones.
- Add beads or buttons: Slip them into clusters or chain spaces. Instant elegance.
- Try non-traditional fibers: Bamboo, silk blends, or even recycled plastic yarn can create surprising textures.
The goal isn’t to be perfect. It’s to be curious.
Every crocheter I know who’s found their signature style started with one question: What happens if I…?
So ask it.
Try one new combo this week. Even if it doesn’t turn out “right.” Crochet doesn’t fail. It evolves.
Final Thoughts: Your Hands Are Your Signature
Every stitch you make carries a piece of you.
The way you hold your hook. The rhythm of your hands. The way you pull that last loop just a little tighter—or leave it loose on purpose.
That’s what makes your work irreplaceable.
Texture isn’t just about looking good. It’s about feeling good. For you, and for the person who holds your creation.
So the next time you pick up your hook, don’t just think, What am I making? Ask yourself: How do I want this to feel?
Soft? Bold? Whimsical? Grounded?
Let your stitches answer.
And if you’re ready to step beyond the basics—start with one combo today. Try the FPdc/BPdc rib. Or make a tiny swatch with puff stitches. Don’t wait for “perfect.” Start with curious.
Because the world doesn’t need another plain blanket.
It needs your texture.
Your voice. Your hands. Your art.
Ready to create something unforgettable?
Try one of the stitch combos above this week—and snap a photo of your progress. Tag me on Instagram (@YourCrochetJourney) or drop a comment below: Which texture combo are you trying first? I read every one.
And if you loved this guide? Share it with a friend who’s ready to fall in love with crochet all over again.
Your next masterpiece? It starts with one stitch.
Now go make it beautiful. 🧶

Maria Santos is a dedicated crochet and knitting enthusiast who finds joy in turning simple strands of yarn into meaningful, handmade art. With a natural eye for detail and a deep love for fiber crafts, she brings warmth, creativity, and years of personal experience to every project. Maria is inspired by the stories woven into each stitch and loves sharing that passion with others.


